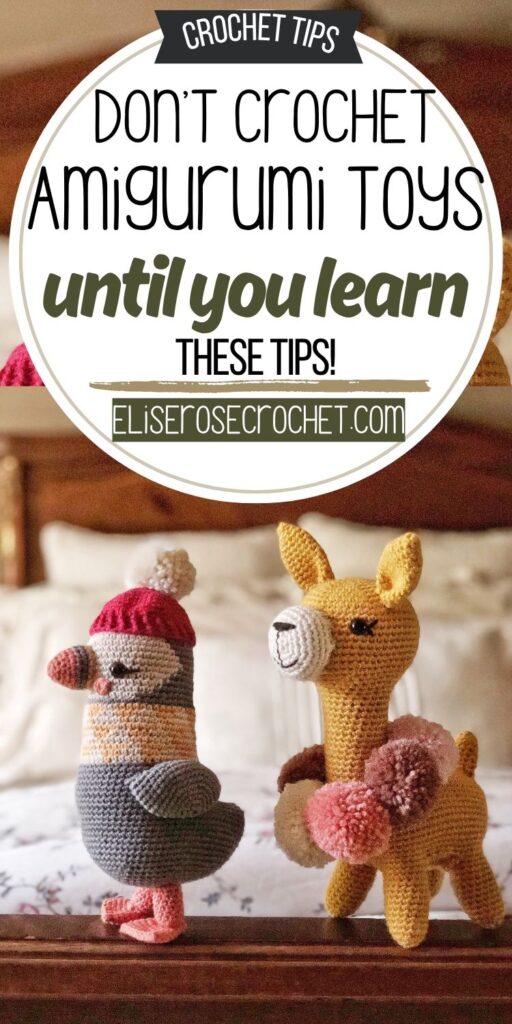
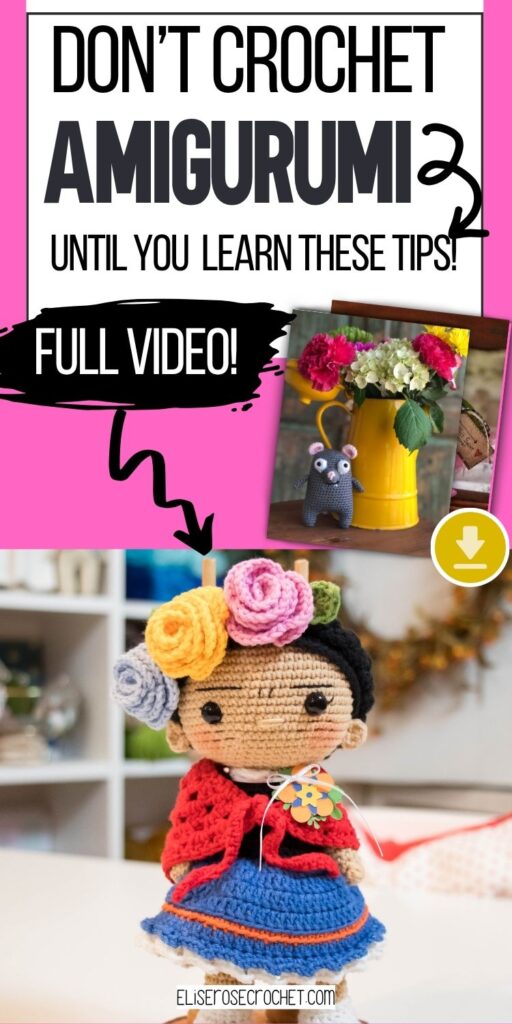
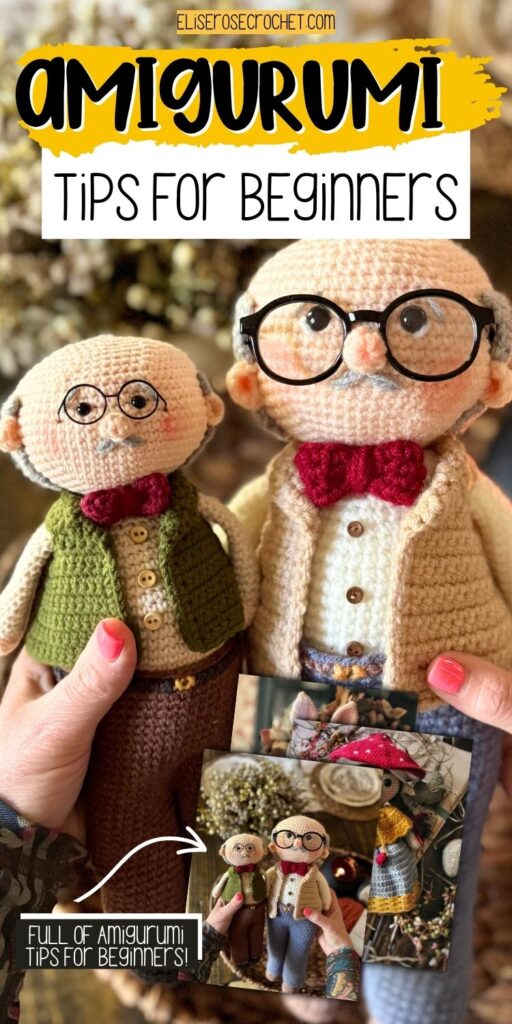
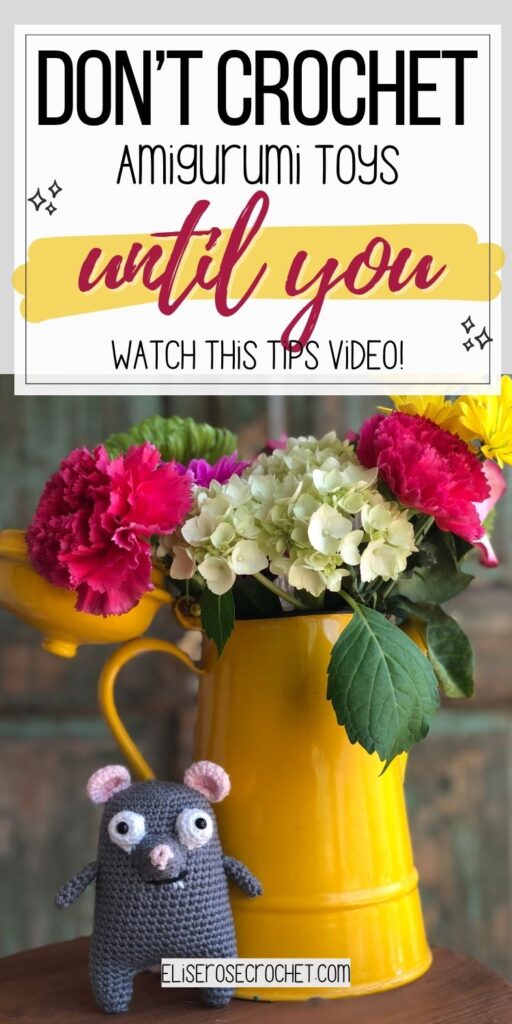
Don’t Start Crocheting AMIGURUMI TOYS Until You Watch THIS
Crocheting amigurumi toys is fun and rewarding, but it can be frustrating for beginners who don’t know where to start. After seven years of trial, error, and plenty of lopsided limbs, I’m sharing my ultimate tips to help you skip common mistakes and start making amigurumi toys you’ll be proud of.
So… you want to start crocheting amigurumi toys.
First of all…welcome. You are about to enter one of the most delightful, slightly obsessive, totally rewarding corners of the crochet world.
But before you grab your hook and yarn, I want to share a few things with you. This is my ultimate amigurumi tips video, the one I wish I had when I started.
Don’t Start Crocheting AMIGURUMI TOYS Until You Watch THIS
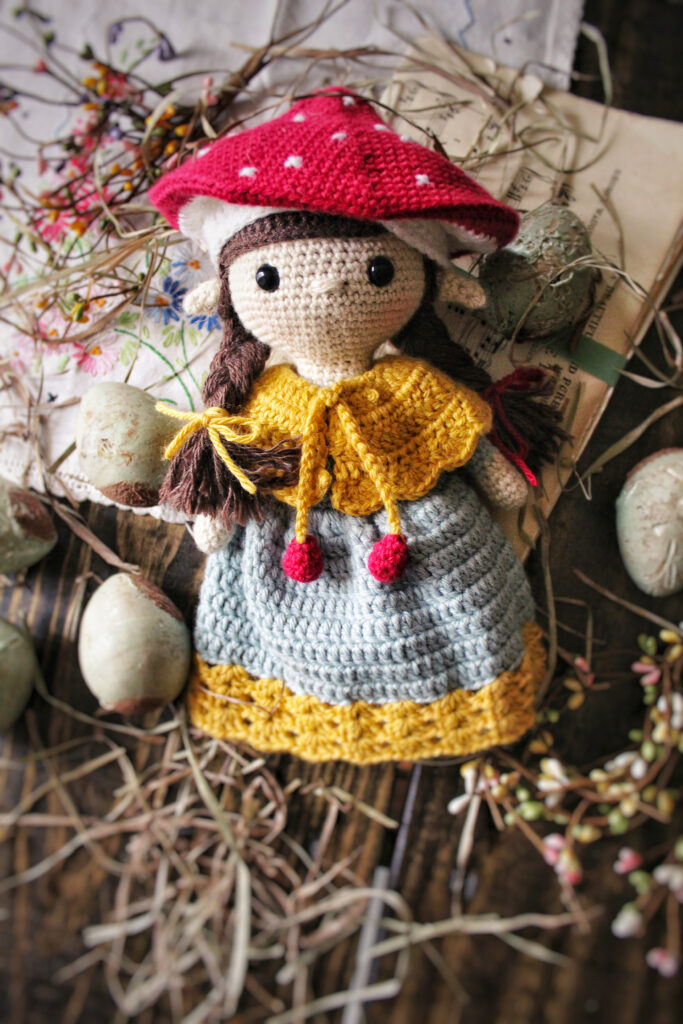
Get the Mushroom Fairy Pattern Here
This post contains affiliates links and at no cost to you I may earn a teeny tiny commission if you choose to purchase them. Please know that I only recommend products I use and love! Thank you for supporting Elise Rose Crochet! You can read my full (and slightly boring) full disclosure here.
I’ve been crocheting amigurumi for almost eight years now, and this post is packed with everything I’ve learned through trial, error, crooked limbs, lumpy heads, and lots of ‘oops’ moments.
I’m not holding anything back.
Whether you’ve never made a toy before or you’ve already dipped your toe into the world of amigurumi, these are the tips that will save you time, frustration, and maybe even a little bit of yarn-related heartbreak.
Pin for Later!
Choose the Right Yarn for Amigurumi
Alright, let’s talk yarn, because your choice of yarn matters a lot more than you might think when it comes to amigurumi. And if you’re just getting started, I’m going to give you a big tip right out of the gate: don’t start with chenille yarn.
I know, I know. It’s soft, it’s fluffy, it makes the cutest squishy toys… but it’s also really hard to see your stitches, it sheds like crazy, and sometimes it’s not very forgiving if you have to frog anything. I promise, you’ll have a much better experience with your first few toys if you skip chenille for now and come back to it once you’ve got the hang of the basics.
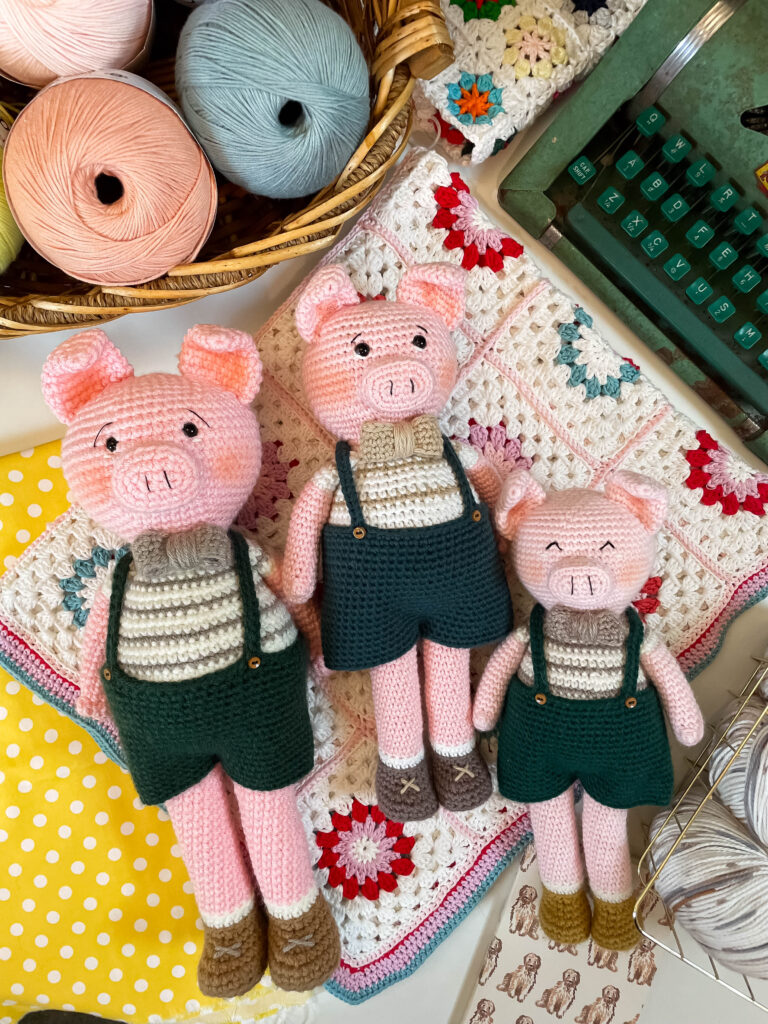
Get the 3 NOT So Little Pigs Amigurumi Pattern Here
Instead, go for something smooth and easy to work with, like cotton, cotton blends, acrylic, or wool. These yarns hold their shape better, don’t fuzz up as much, and make it a whole lot easier to see your stitches clearly.
I also recommend starting with a #4 worsted weight yarn. It’s thick enough to be beginner-friendly, but not so bulky that your toys look clunky.
Here are a few of my personal favorites:
- Premier Basix – This is a great budget option. It’s soft, it comes in tons of colors, and it’s really easy to find.
- Paintbox Wool Mix Aran – A lovely mid-range choice. It has that nice wooly bounce, but it’s still smooth and easy to crochet with.
- Berroco Vintage – This is more of a premium yarn that you’ll find in local yarn shops, and it’s one of my all-time favorites for toys. It’s soft, has beautiful stitch definition, and it holds up really well over time.
I’ve used all of these yarns in tons of projects and had great results. But of course, they’re not the only options out there. There are so many different ones to choose from!
Just do a simple Google search and you’ll find so many great recommendations.
The most important thing is to start with something that’s smooth, not too slippery, and easy to handle. Roll a strand of the yarn around in your hands to make sure the plies aren’t splitting (splitty yarn for amigurumi is a nightmare to work with). I also recommend starting with a light color so that you can really see your stitches, avoid super dark colors and variegated yarns to begin with.
Pick a Good Quality Crochet Hook
Now let’s talk about what I honestly think is the most important tool in your amigurumi toolkit: your crochet hook.
I know it might be tempting to just grab whatever hook came in that starter kit or the cheapest one you can find at the craft store. But please don’t think all crochet hooks are the same, because they absolutely aren’t.
There is a huge difference in how you can crochet (especially small amigurumi stitches) with a good quality hook. And the good news is, you don’t have to spend a fortune to get a great one.
I highly recommend using a metal hook when you’re crocheting toys. Metal helps your hook glide through the stitches more easily. I prefer an ergonomic handle and that can help protect your hands and wrists from fatigue.

Check Out Clover Amour Crochet Hooks Here
My top recommendation for beginners (and honestly, even for seasoned crocheters) is a set of Clover Amour hooks. I can’t tell you how many comments I’ve gotten from people who finally tried them and were shocked by how much of a difference they made.
They’re smooth, lightweight, comfortable to hold, and they come in a full range of sizes. That’s important, because once you start experimenting with different yarns or want to change the size or density of your toys, having a few hook sizes on hand makes all the difference. (We’ll talk more about that in just a bit!)
Master the Magic Ring Before You Start Crocheting Toys
Okay, if you’ve heard that the magic ring is one of the trickiest parts of amigurumi. You heard right.
Learning how to make it confidently is one of the most important skills you’ll need when it comes to crocheting toys. Sometimes people don’t get right on the first try. Or the second. Or even the fifth. So don’t let it discourage you. Just practice, practice, practice before jumping into your first full pattern.
Now, it’s true, not every amigurumi pattern starts with a magic ring. In fact, many of my own designs use alternate starts. But even if your toy doesn’t begin with one, chances are the magic ring is still hiding somewhere else in the pattern, maybe in the arms, the legs, or another small part of the construction. So you’re going to need that skill sooner or later.

Learn How to Make a Magic Ring Here
I have a full tutorial on how to make a magic ring, and I’ve heard from quite a few people that it finally ‘clicked’ for them after watching it. But there are tons of great tutorials out there, and I always tell people: find the one that works best for you. Sometimes it’s just a matter of seeing it from a different angle or hearing someone explain it in a new way.
Learn More About the Woobles Here
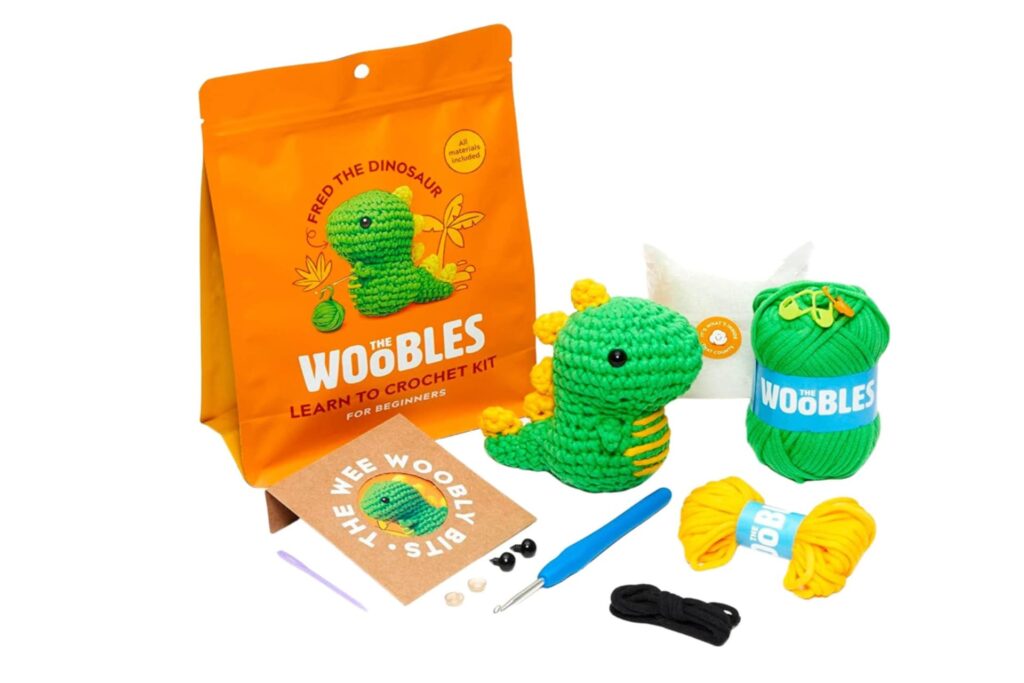
Now, there is another school of thought (and I think it’s a valid one) which is to start with a beginner amigurumi kit like The Woobles. Their kits actually come with the magic ring already made for you, which lets you jump straight into learning the stitches and shaping without getting stuck on that very first step.
And if that’s what gets you started? I say go for it! But just know: when you’re ready to move on to more complex patterns you’ll absolutely want to have the magic ring in your toolbox.
Match Your Crochet Hook to Your Yarn (Not the Label!)
Now let’s talk about something that trips up a lot of beginners: matching your crochet hook size to the yarn you’re using.
When you’re making amigurumi, you generally do not want to use the hook size recommended on the yarn label. That might work great for scarves or sweaters, but for toys, it usually results in a fabric that’s too loose and that means your stuffing will start peeking through, which no one wants.
Most of the time, an amigurumi designer will recommend a yarn and hook size that work well together for their pattern, and that’s usually the best place to start. But here’s the twist: you’re not making something to fit your body, so gauge isn’t everything. In fact, it’s often not even that important.
What is important is matching the hook to the yarn in a way that works for you, for your personal tension and for the kind of fabric you want to create.
Personally, when I’m using a new yarn for the first time, I like to experiment a little. I’ll try one hook size, see how it feels, and ask myself a few questions:
- Is the hook grabbing the yarn easily, or does it feel like a struggle?
- Are the stitches snug enough to hide the stuffing?
- Does the fabric feel firm but still flexible enough to shape into a toy?
Sometimes this takes a little trial and error. But I promise, it’s worth it. Eventually, you’ll learn which hook sizes pair best with the yarns you like to use. And that’s where the magic really starts to happen, when you can confidently adjust things to get exactly the look and feel you want in your toys.
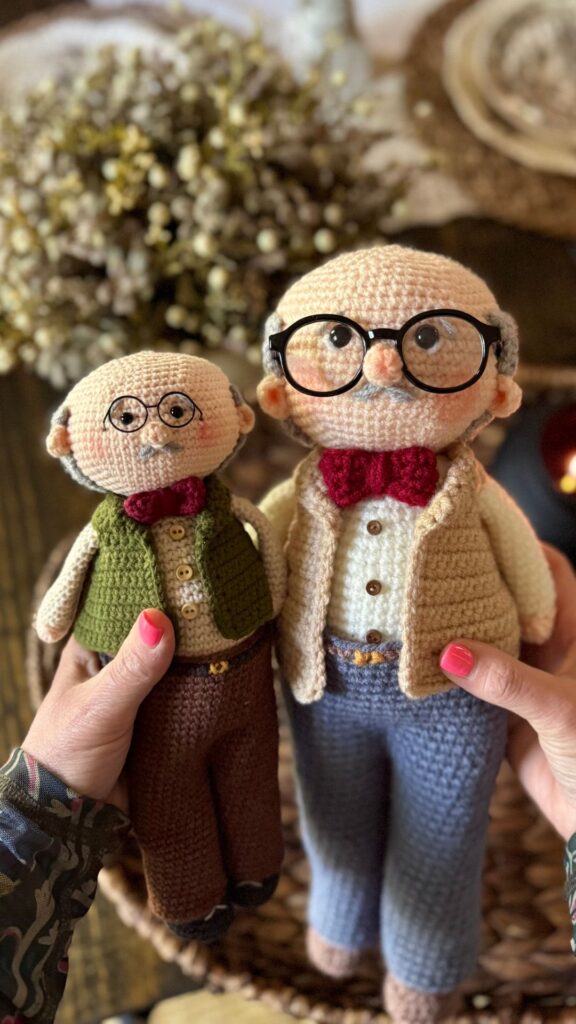
Learn How to Crochet an Amigurumi Grandpa Here
Start with Basic Amigurumi Toys (NOT Complicated Patterns)
Let’s talk about where to actually begin. Because when you first discover amigurumi, it’s so tempting to dive right into the really cute, detailed patterns, the ones with clothes and tiny accessories and ten different pieces.
But trust me on this one: start with the basics. You want a beginner-friendly toy that will help you learn the foundational skills without overwhelming you.
I have a full step-by-step tutorial for one of my most beginner-friendly toys, Bubble the Catster. It’s a super simple, straightforward project, but it covers all the essential amigurumi techniques. If you’ve never made a toy before, that tutorial is a great place to start. You’ll learn how to shape your toy, stuff it properly, and assemble everything together in a way that makes sense.
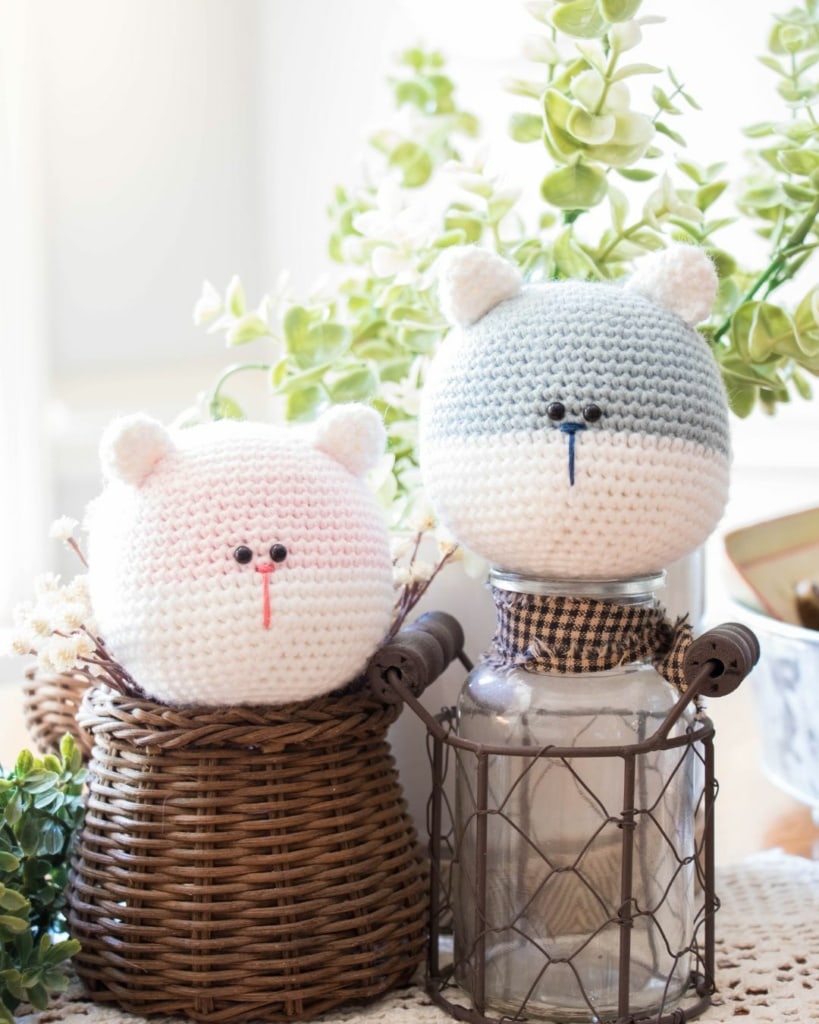
Check Out Bubble the Catster: Beginner Amigurumi Tutorial Here
Video tutorials can be a huge help when you’re just getting started. Sometimes, seeing the exact way someone holds the yarn or attaches a limb makes all the difference. And the great news is, there are lots of high-quality tutorials out there.
In general, look for videos that have a good number of views, clear close-ups, and positive comments. That usually means other beginners found them helpful too.
The key here is to build your confidence first. Once you get a feel for the rhythm of amigurumi, you can absolutely move on to more complex patterns. But starting simple sets you up for success and gives you a finished toy you can actually feel proud of.
Extra Tools for Amigurumi
Get Animal Friends of Pica Pau Here
Now, let’s talk about a tiny tool that makes a huge difference when you’re crocheting toys: stitch markers.
Let’s talk a little bit about the extra tools you might want to have on hand.
The most important one in my opinion is a stitch marker.
You might think, “Do I really need one of those?” And the answer is: yes. Yes, you do. Because when you’re working in continuous rounds (which most amigurumi patterns use) it is so easy to lose track of where the round begins.
The good news is, you don’t need anything fancy to mark your spot. A long piece of yarn in a contrasting color works just fine. You can even use a safety pin or a paper clip. But let me tell you about my personal favorite: those little lightbulb-shaped locking stitch markers.
They clip securely into your stitch and they stay put, which is incredibly important, because there’s nothing more frustrating than happily crocheting away… only to realize your stitch marker fell out ten minutes ago. (Ask me how I know.)
I used to use those spiral-style stitch markers. They were cute, but they had the nasty habit of slipping out right when I needed them most. I eventually gave up on them completely.
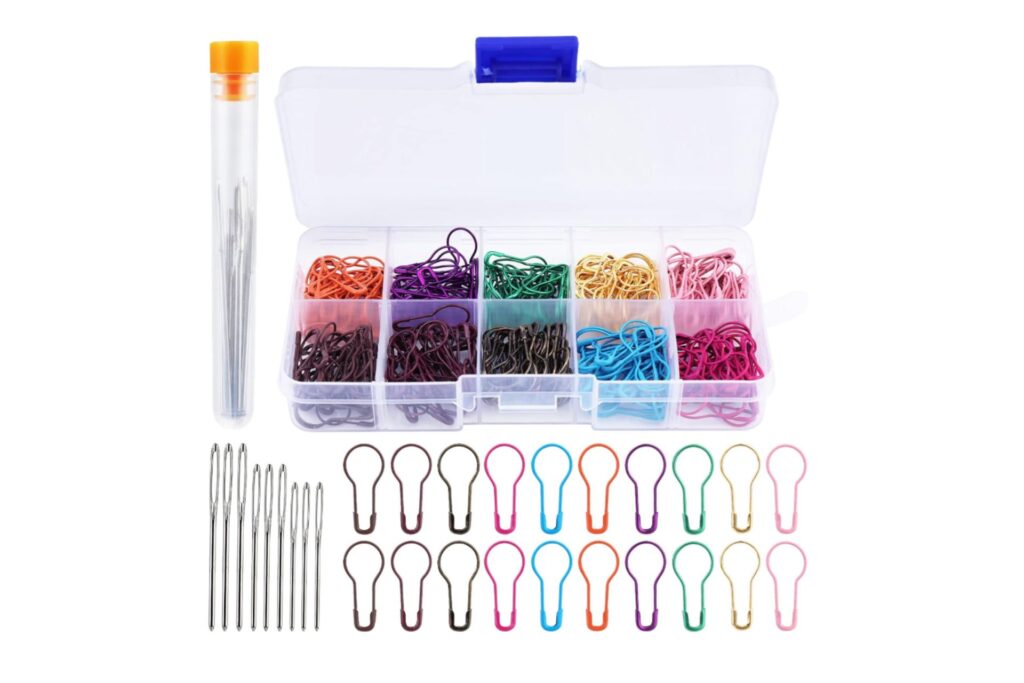
Find the Lightbulb Stitch Markers Here
One other tip: choose stitch markers that won’t stretch out your stitches. Some of the bigger plastic ones left little gaps in my toys that never fully bounced back. The smaller, lighter locking ones tend to be gentler on your work and they give you peace of mind, which is honestly priceless when you’re trying to stay on track.
Another tool that I use every single day is my neck light. This helps me to be able to really see my work. I typically crochet in the evenings and I need a good light source. The one I have is rechargeable and I’m able to move the light to the exact spot I need to see.
Check Out the Crafting Magnifying Glass Here
Recently I picked up a new tool that I find myself reaching for more and more these days. This is a magnifying glass with a light. It sits around my neck and it magnifies my work. I typically use a #2 weight yarn and my old eyes aren’t what they used to be. I have found that for certain stitches and darker colors this has really been a game changer for me. If you have great eyesight you probably don’t need this, but if you struggle at all, this could be a really helpful tool.
Count, Count… and Count Again
I’ll be honest. This one’s not the most fun part of making amigurumi, but it might be one of the most important: count your stitches.
I know… it’s a little tedious. And you might be thinking, ‘Do I really need to count every single round?’ Maybe not every single one, but you do need to count often. Because with amigurumi, every stitch matters.
It is so easy to accidentally add a stitch or skip one without even noticing. You get into the rhythm, your brain drifts a little and suddenly, your perfectly round head is turning into a lopsided oval.
The thing is, when you’re crocheting toys, accuracy really is important. The stitch count is what creates the shape of the toy. And being off by just one or two stitches here and there might not seem like a big deal at first… but those little errors can stack up and create a major headache later on.
I always recommend taking a pause every few rounds to do a quick count. It doesn’t take long, and it’s so much easier to fix a mistake early than to realize something’s wrong twenty rounds later.
“Safety Eyes” Aren’t Always Safe
Let’s clear something up: ‘safety eyes’ might not actually be safe.
I know, the name is confusing. It’s a total misnomer. Safety eyes are those little plastic eyes you can snap onto your amigurumi toys, and they’re super popular because they’re fast and cute. But here’s the thing: they are not safe for children under three or for pets.
Even though they lock in place, they can still come loose under the right (or wrong) conditions, and they pose a serious choking hazard for babies, toddlers, and animals.
So if you’re making toys for any of these more vulnerable groups, I strongly recommend embroidering the eyes instead. And don’t worry, embroidered eyes can be adorable. I actually have an entire Pinterest board filled with creative, expressive embroidered eyes if you want some inspiration!
Now, if you are making a toy that won’t be given to small children or pets and you want to use safety eyes, I’ve got a few tips to make that process a whole lot easier.
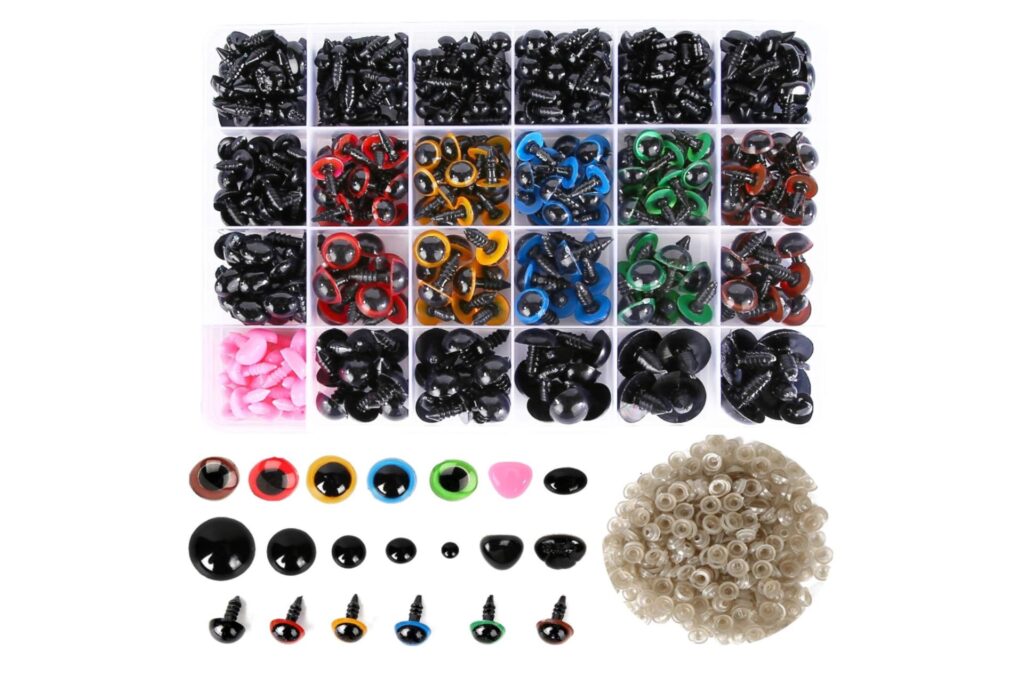
First, you might want to get a safety eye tool. If you’ve ever struggled to push the back on those little eyes, you know what I mean. I use two different kinds:
- The first is a simple wooden ball with a metal tube. I bought it on Amazon for $6.99 and it works great.
- The second is the Craft Easy Eye Snapper—this one’s super helpful, especially if you use a variety of eye sizes or shapes. It just makes the whole process easier on your hands.
And lastly I’ve found two websites I really like for buying safety eyes.
I used to buy mine on Amazon, and it was hit or miss. One set would be fine, and the next would have backs that broke in half or just wouldn’t stay on.
These days, I buy my safety eyes from two shops I really trust: Glass Eyes Online and 6060 Eyes. Not only do they have a huge variety of styles so you can really customize your toys. But the quality of the backs is so much better. I’ve never had one pop off or snap in half. And when you’ve put all that work into your toy, having secure, reliable eyes makes a huge difference.
Learn How to Stuff Your Toys (It’s Trickier Than You Think)
Let’s talk about something that seems super simple, until you actually try it: stuffing your amigurumi toys.
I get questions about this all the time, so if you’ve ever felt like you’re doing it wrong. Don’t worry. You are definitely not alone.
I personally like to use Polyfil stuffing. It’s easy to find and works great for most toys. But there are other options out there, and different brands have slightly different textures. You might find one you like better, so don’t be afraid to try a few.
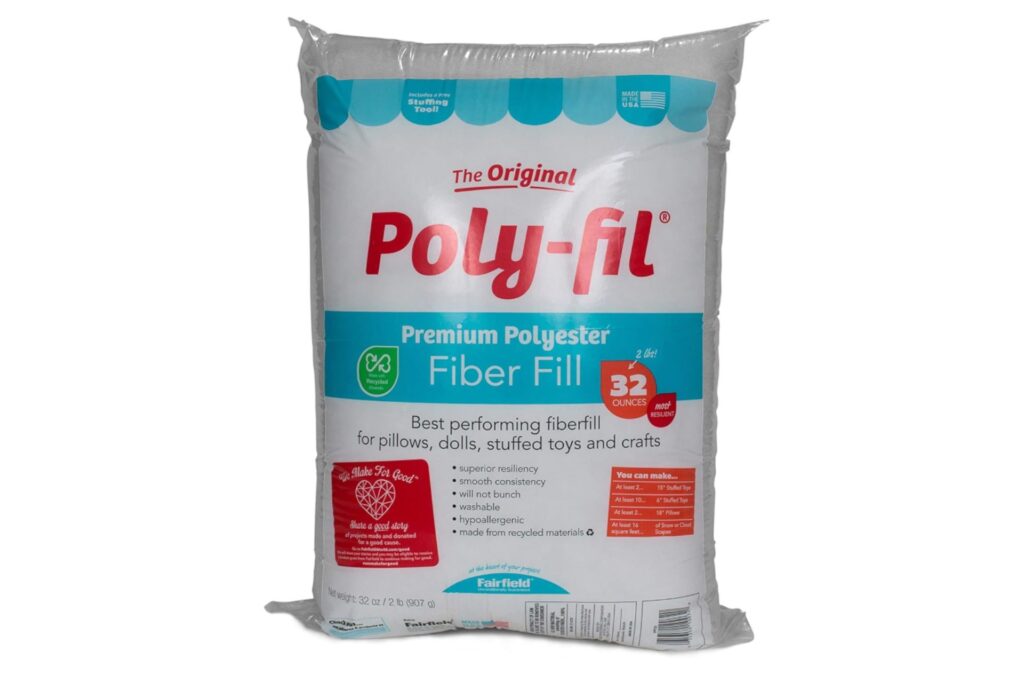
My biggest tip is this: add your stuffing a little at a time. Don’t grab a giant handful and try to cram it all in at once. Instead, take small pieces and gently press them into place, especially as you’re crocheting. This helps you shape the toy evenly and keeps things from getting lumpy.
And be careful not to get your stuffing too close to your working yarn. If it starts poking out between your stitches or getting caught on your hook, that’s usually a sign you’re stuffing too aggressively or too soon.
Now here’s a little personal preference. I like to slightly overstuff my toys. That’s because over time, stuffing tends to compress and deflate a bit. So giving it that little extra firmness helps the toy hold its shape in the long run.

I especially pay attention to the head. You’d be surprised how much stuffing it takes to get a head that looks nice and round without any sagging or dents. A soft, under-stuffed head can make the whole toy feel off.
And if you’ve ever had trouble with wobbly necks, you’re not alone. One trick I’ve used is rolling up a piece of felt and inserting it into the neck before attaching the head. You can shape it to fit perfectly, and it gives the toy more structure.
Another clever hack I’ve heard from other crocheters is using foam hair rollers inside the neck. They’re soft, lightweight, and help keep everything standing tall. No flopping.
As for arms and limbs, I usually stuff only the lower part, just up to the “elbow” area. I leave the upper section near the shoulder unstuffed so the arms can lie flat against the body instead of sticking out at weird angles.
One final tip: I like to save my yarn scraps and mix them into my stuffing. It reduces waste, adds a little weight to the toy, and stretches your stuffing just a bit further.
It might take a few tries to get your stuffing just the way you like it, but once you get the hang of it, you’ll see what a difference it makes in the final look and feel of your toys.
Would you like a final conclusion to wrap up the video? I can help you craft a strong ending that encourages viewers to get started and reminds them they don’t have to be perfect.
Learn How to Attach the Pieces (Everyone Hates This Part)
Now we’ve arrived at what is hands down the most dreaded part of making amigurumi: attaching the pieces.
I don’t know a single crocheter who gets excited about sewing on body parts. It’s a bit tricky, kind of fiddly, and it takes some patience. But it’s also one of the most important steps in getting your toy to look just right.
First of all, placement matters a lot. I’ve definitely sewn on a snout or an ear, woven in my ends, and then looked at it from a different angle only to realize… nope. Totally crooked.
That’s why I always pin my pieces in place first and take a good look before I ever pick up my needle. I turn the toy, check it from all angles, and really take my time here. This is not the moment to rush.
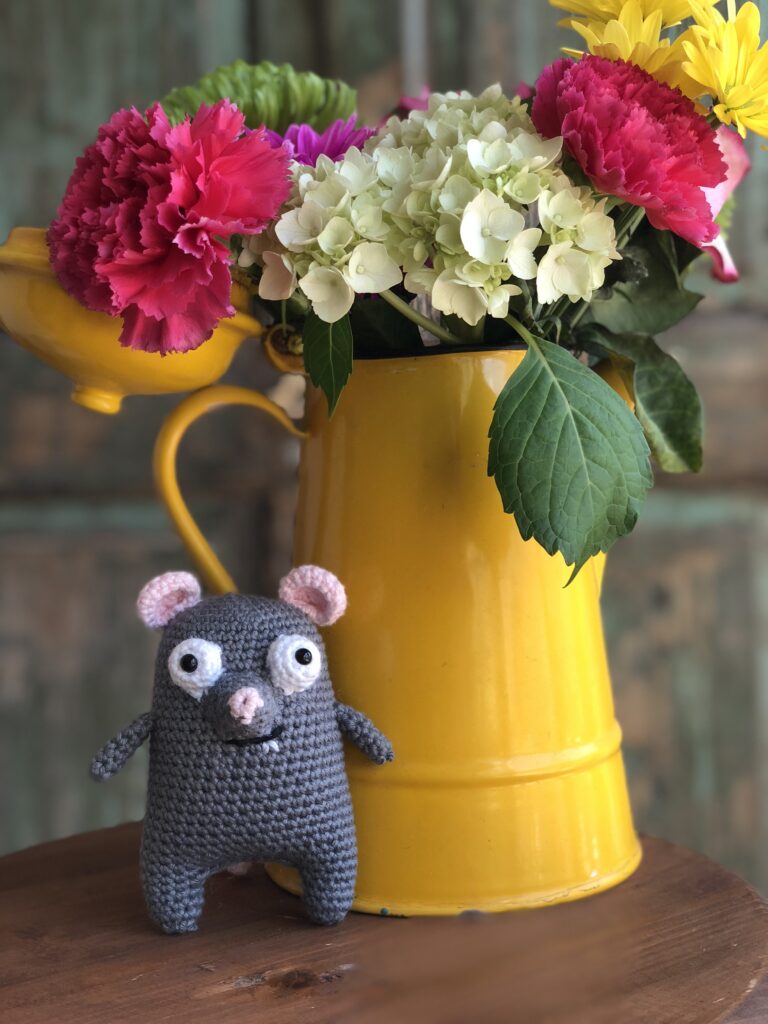
When it comes to the actual sewing, I walk you through exactly how I do it in many of my full tutorials—like Bubble the Catster or Petunia Petalmouse. The goal is to sew the pieces on as close to the stitches as possible, almost tucking the sewing yarn into the valleys between stitches so it disappears.
The less you can see the yarn you’re sewing with, the cleaner your final toy will look.
One of my favorite tips? Sew on the facial features before you close up the head. It’s so much easier to embroider a nose or attach eyes when you have full access to the inside of the head. I show exactly how I do this in my Mr. Humphrey tutorial, if you want to see the process in action.
At the end of the day, attaching the pieces just takes practice and patience. I can show you my method, but over time, you’ll find what looks neatest and works best for you. And don’t worry, everyone has a wonky ear or lopsided arm story. It’s part of the learning process.
Little Details Are What Make Amigurumi Shine
Now we’re getting to the part that gets me really excited: the little details. This is where your amigurumi goes from ‘cute’ to ‘completely irresistible,’ and it’s also where your unique style can really start to shine.
Maybe you like a more minimal, simple toy with clean lines and just the basics. Or maybe (like me) you love all the tiny, thoughtful details that give your toys personality and charm.
One thing I’ve learned over the years is that paying attention to “symmetry or purposeful asymmetry” can make a huge difference, especially when you’re placing facial features. A slightly tilted smile or an eyebrow with a little attitude can totally change the expression of your toy.
Don’t be afraid to play around with shapes: eyebrows, lashes, blush marks, even freckles. These are the little touches that bring your toys to life.
When it comes to how to add those details, I’ve found two techniques that work really well:
- First, embroidery floss. It gives you clean, crisp lines and lots of color options.
- Second, if you’re using a yarn like YarnArt Jeans, which I absolutely love for amigurumi—you can actually separate the strands and use just one or two threads for embroidery. This gives you finer detail than using the full strand, which can look bulky and messy on those smaller features.
I’ve made the mistake of trying to embroider facial details with a full strand of worsted weight yarn, and let me tell you, it does not look cute.
But with a little patience and the right materials, those final touches are so worth it. They’re what make people say, ‘Oh my gosh, this is adorable…did you make that?’
So don’t skip the details. That’s where the magic lives.
Learn to Read a Pattern (It Will Open Up a Whole New World)
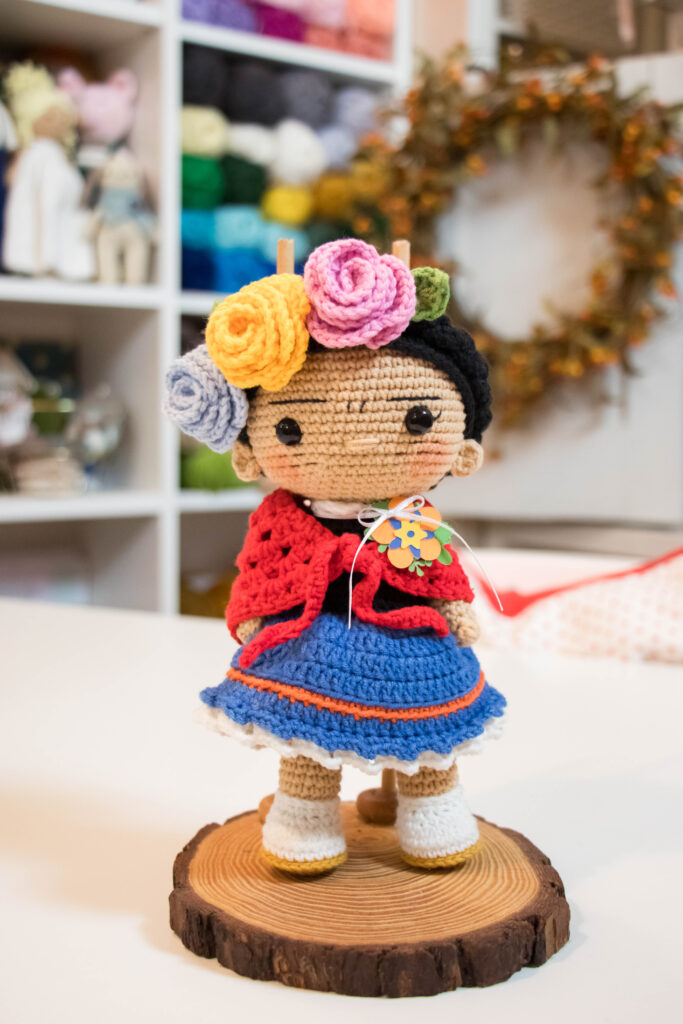
Find the Frida Kahlo Amigurumi Pattern Here
Last but definitely not least…learn to read a crochet pattern.
I actually started my amigurumi journey with video tutorials, and I still think they’re a fantastic way to learn. But I was already comfortable reading written patterns and let me tell you, once you have that skill, it’s like a whole new world opens up.
At first, reading a pattern can feel like trying to decode a secret language. All those abbreviations “sc, inc, dec, BLO” it’s a lot. But the more you practice, the more it starts to click. Eventually, you’ll be able to glance at a row like “6 sc, inc” and know exactly what to do without even thinking.
And here’s why it’s worth learning: there are so many incredible amigurumi patterns out there that are only written. Some of the most creative, detailed, and imaginative designs live in pattern form and once you know how to read them, you can make anything.
It doesn’t mean you have to give up video tutorials! But adding this skill to your toolbox gives you way more freedom and way more options. So if you’re feeling ready to take the next step in your amigurumi journey, this is it.
Don’t Get Tricked by AI Patterns
I wish I didn’t have to include this, but here we are. AI-generated pattern scams are everywhere right now, and they’re hitting the amigurumi world hard.
Scammers are using AI to crank out patterns that look adorable in the photos but the patterns themselves? Absolute garbage. I actually made an entire video where I tested one of these AI-generated whale patterns, and spoiler alert: it did not go well.
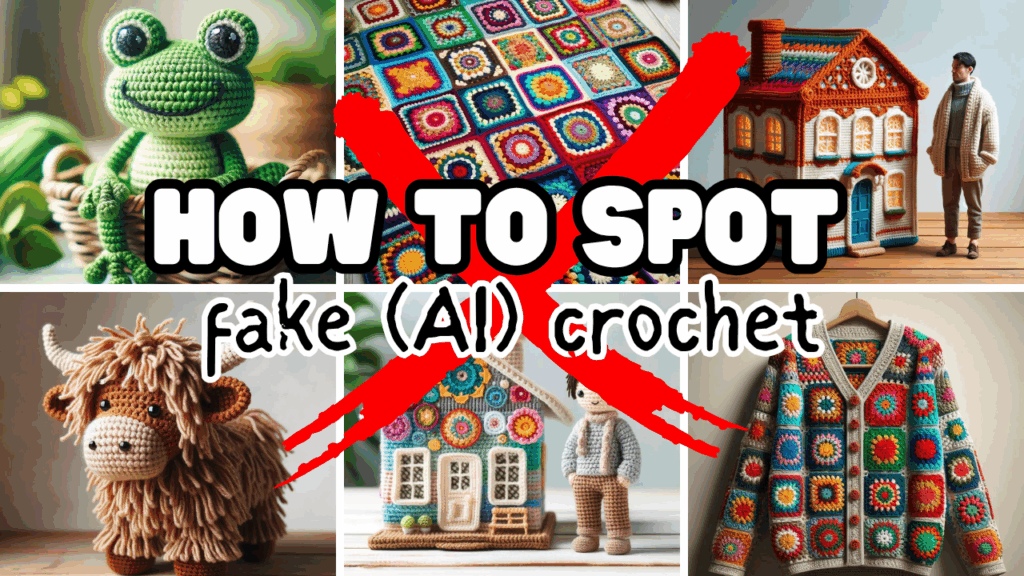
Read How to Spot FAKE (AI) CROCHET So You Don’t Get SCAMMED Here
Here’s the short version: be extra cautious when you’re browsing Pinterest, Facebook, and even Etsy.
Facebook is full of scam groups right now, and people are being duped left and right. Pinterest is also flooded with links to patterns that either don’t work or don’t exist. And while Etsy is home to many amazing, legitimate designers, there are unfortunately scammers there too—including people selling stolen patterns from real creators, which is a whole other problem.
One platform that’s been relatively safe so far (as far as I know) is Ravelry. Most of the designers there are real people, and the community helps flag bad actors.
But no matter where you’re browsing, the big question is: How do you know if a pattern is real?
Here are a few quick tips to help you spot a legitimate designer:
- If it looks too perfect, it probably is.
- Look up the designer on Instagram. Every real designer I know has an Instagram page where they interact with their audience. Their page should look like a real person, not a faceless, generic brand.
- Read reviews and comments, if available. Other crocheters will usually warn you if something seems off.
A little homework can save you a lot of time, frustration, and money, not to mention the heartbreak of a failed project. So just be careful, and when in doubt, support a designer whose name you recognize and trust.
Don’t Expect to Be Perfect the First Time
Okay, this last one is something I wish every beginner could hear loud and clear: don’t expect your first amigurumi toy to be perfect.
In fact, let me show you something. This right here was my very first amigurumi toy and yes, it’s riddled with mistakes. Crooked stitches, wonky limbs, weird proportions… but I loved it. And more importantly, I learned from it.
And now, here’s Mrs. Humphrey, one of my latest amigurumi designs. She’s elegant, expressive, full of personality and she never would’ve existed if I hadn’t made that first, lumpy little toy.
I’m living proof that practice really does make progress. Not perfection (because I’ve never made anything truly perfect in my life) but close enough to be proud of.
Think of your first toy as exactly what it is: practice. You don’t have to post it on Instagram. You don’t have to show your friends or family. Unless, of course, you’re like I was and you’re just so excited you can’t help yourself.
This is the time to give yourself permission to play. To make mistakes. To try things and mess them up and try again. Because honestly? Mistakes are the best teacher. You’ll learn more from one wobbly little toy than from any video or tutorial—including this one.
So just start. Mess up. Have fun. And trust that every toy you make is a step toward something beautiful.
Don’t Start Crocheting AMIGURUMI TOYS Until You Watch THIS
I hope this post gave you a clear, honest look at what it really takes to get started with amigurumi—and maybe a little encouragement to actually begin.
You don’t need to be perfect. You don’t need fancy tools or years of experience. You just need a hook, some yarn, a willingness to learn, and maybe a stitch marker that doesn’t fall out on you.
Happy Stitching!
Pin for Later!
![QUICK Crochet Christmas Gifts People ACTUALLY Want [Last-Minute]](https://eliserosecrochet.com/wp-content/uploads/2023/11/Quick-crochet-1.png)