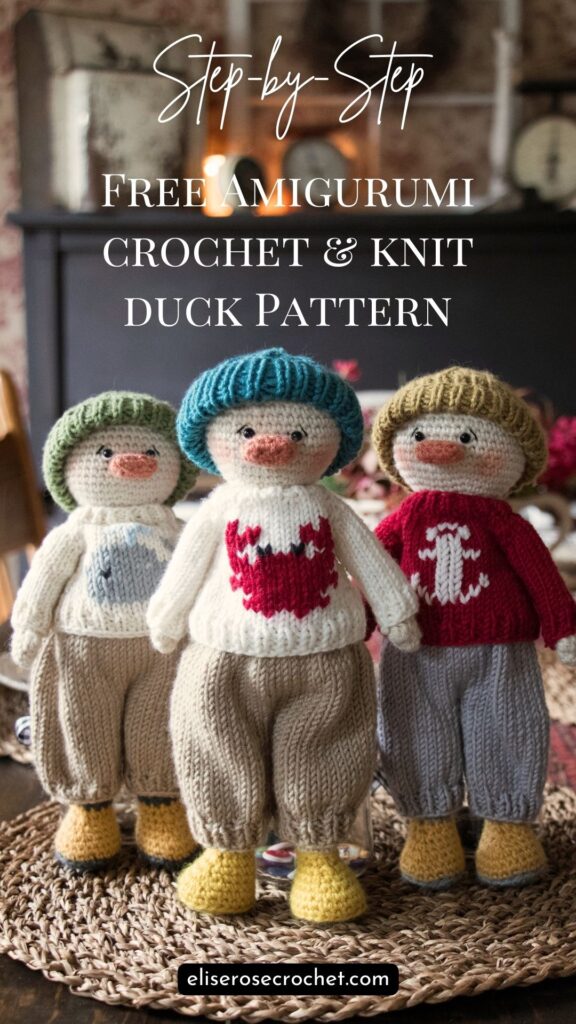
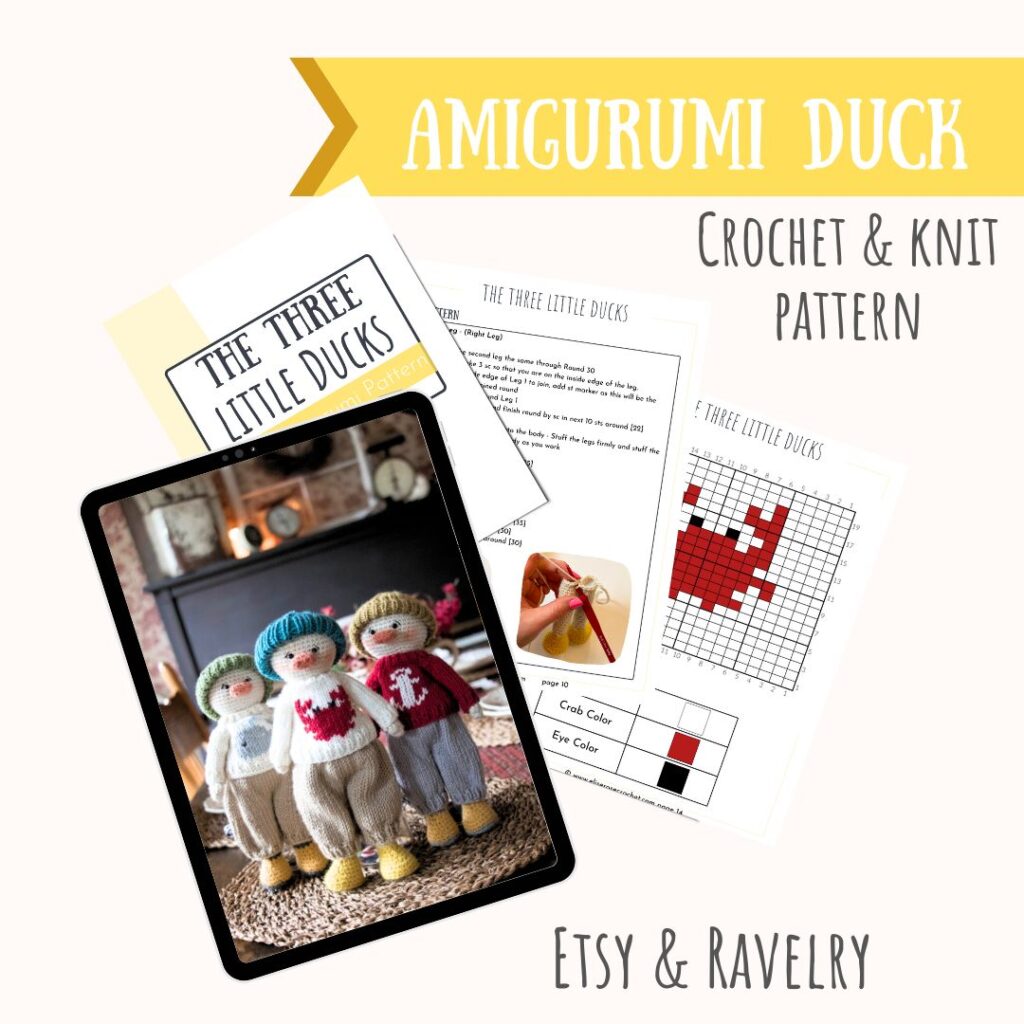
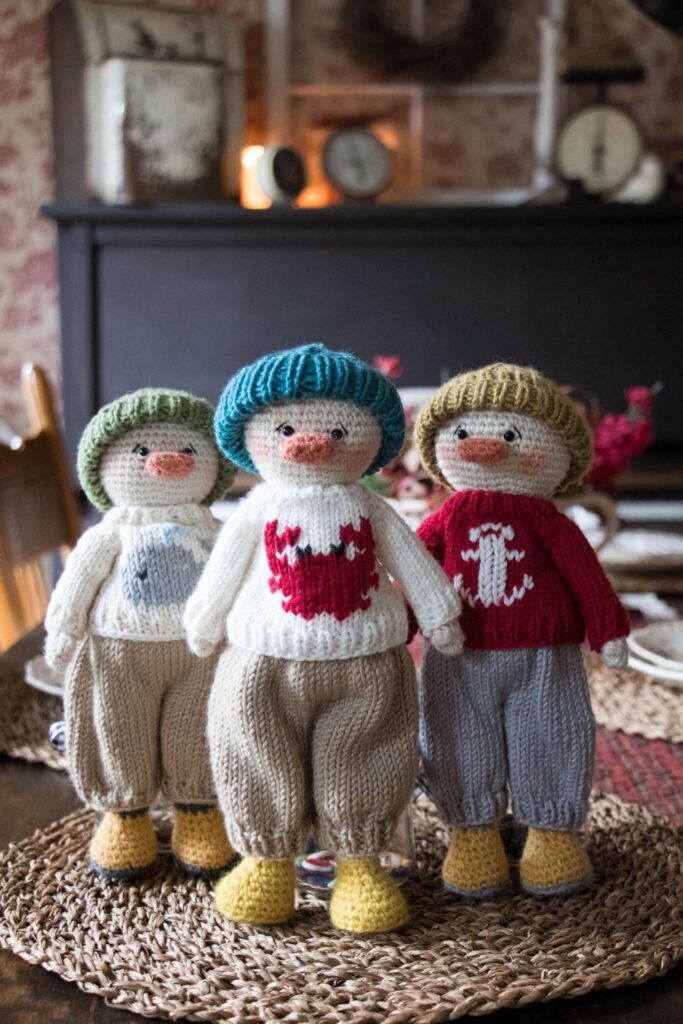
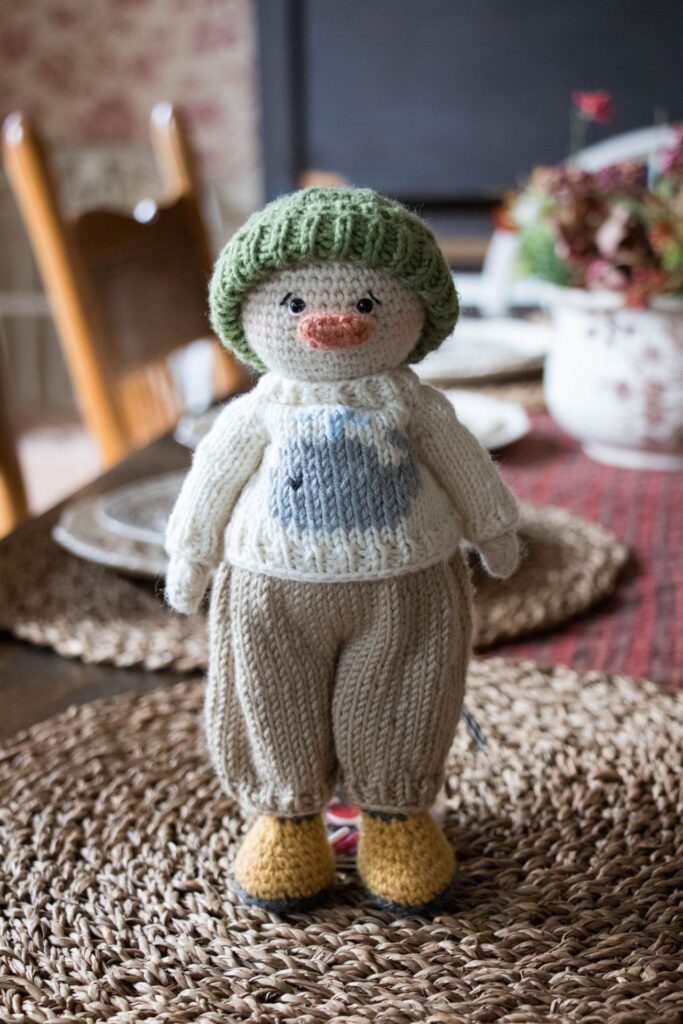
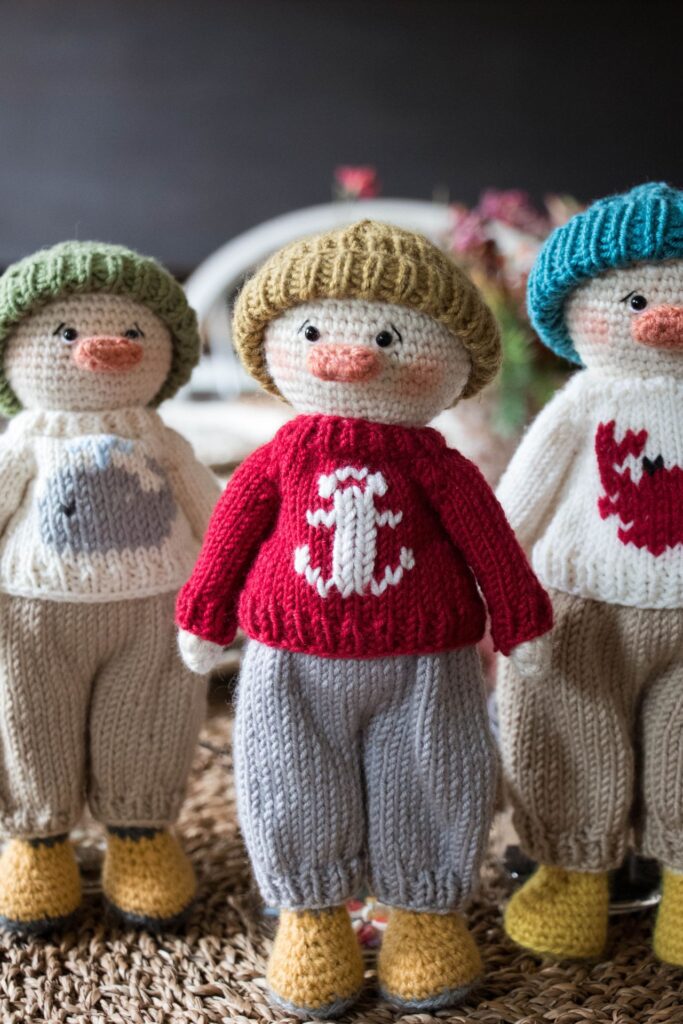
Three Little DUCKS | FREE Amigurumi Duck Pattern
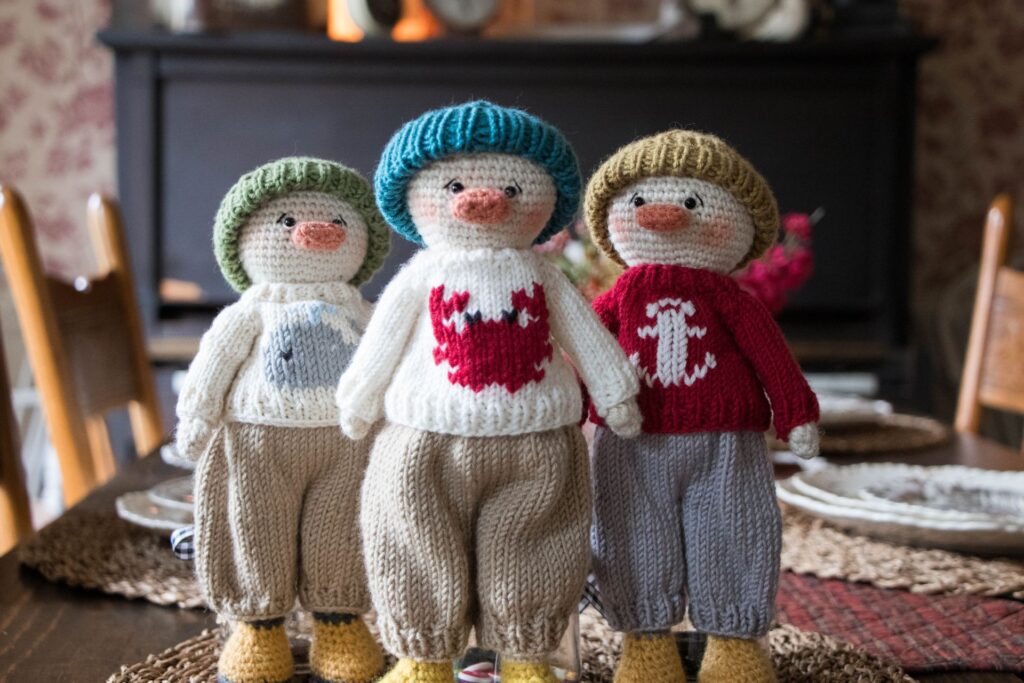
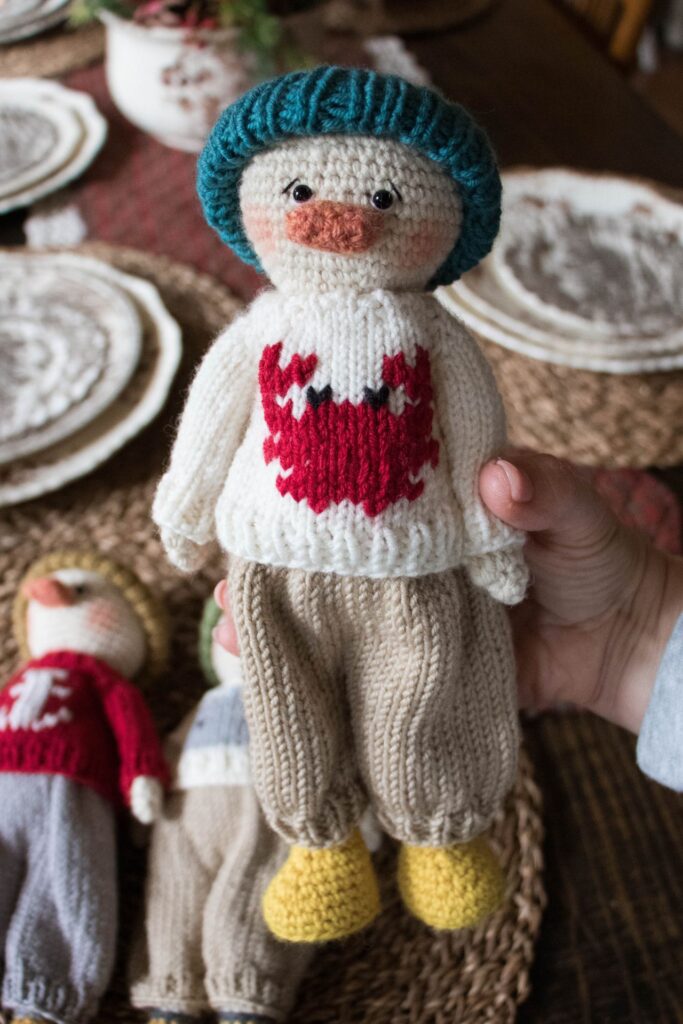
Meet the Three Little Ducks. This FREE amigurumi duck pattern is sure to bring a smile to your face and joy to your crocheting and knitting time.
The Three Little Ducks Amigurumi Pattern is perfect for the intermediate crocheter and knitter. My sincerest hope is that you enjoy every minute of your toy making process.
This pattern consists of a crocheted duck with knitted clothing. The crocheting is standard to most amigurumi toys. We will be crocheting in continuous rounds.
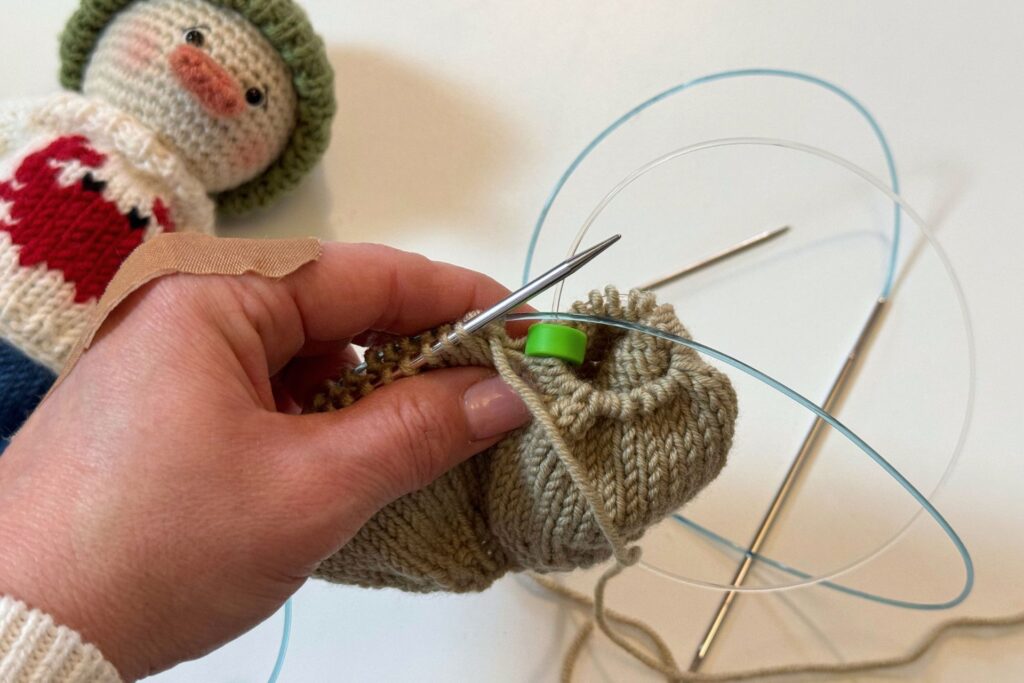
The knitting is done on double pointed needles (DPNs) or magic loop, which can be a little challenging at first. But with a little practice, your needles will be clicking away in no time.
You will find a full video tutorial for how to crochet the duck and knit the clothing in the video below.
Three Little DUCKS | FREE Amigurumi Duck Pattern
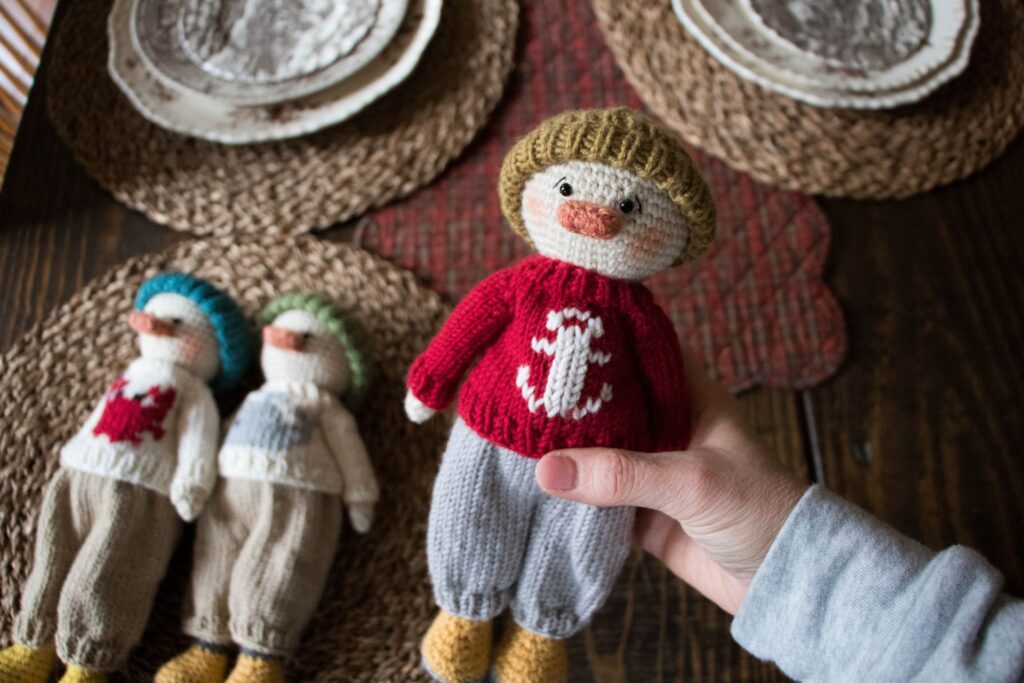
If you enjoy making your little duck, you might like The Three Little Pigs, Not So Big Bad Wolf or A Kitten and Her Mittens patterns. They are also crocheted toys with knitted clothing.
Remember that toy making is a process. It doesn’t have to be perfect and every toy you make will be an opportunity to improve your skills. I’ve learned something from every toy I’ve made.
Please share your finished toys with me on Facebook or Instagram @EliseRoseCrochet ! I would love to see and share your work!
Thank you again for all your support! I treasure each and every one of you!
Important Information about Tension, Fit and Knitting Needle Size
Before we dive straight into this adorable little duck, we need to talk about tension, fit and sizes for your double pointed or circular needles for magic loop.
We will be crocheting the duck first and knitting the clothing second. The clothes need to fit the duck, not the other way around.
With that in mind, you may need to experiment a little with your knitting needle size to knit the clothing to fit the duck properly.
We all have our own unique tension and are using different yarns, so one size doesn’t fit all when it comes to knitting needles.
For example, I am a tight crocheter and have a relaxed knitting tension. I used 3 mm double pointed needles to knit the clothing and it worked out perfectly.
My testers had a different experience. They found the clothing too tight, despite having a similar gauge on their toys. One tester found that 3.5 mm needles worked better and another found that she needed 4 mm needles to get the clothing to fit.
Check out the video: Tension, Fit & Knitting Needles!
When you have finished crocheting your duck, measure how many stitches per inch you have. Check multiple places on your duck to make sure. Then refer to the chart to know which needle size to begin with.
These are suggestions for which knitting needle sizes to begin with. If you find that the clothing is still too tight or too loose, adjust your needle size up/down to find the perfect fit.
Because we are working with a crocheted toy and knitted clothing, there may be a time of trial and error to get the right combination for your tension and yarns used. Once you make the duck the first time you will know which knitting needle size works best for you.
KNITTING NEEDLE SIZE CHART
| Stitches/inch on Duck | Knitting Needle Size for Clothing |
| 6 stitches/1 inch | start with 3 mm DPNs |
| 5 stitches/1 inch | start with 3.5 mm DPNs |
| 4 stitches/1 inch | start with 4 mm DPNs |
This post contains affiliates links and at no cost to you I may earn a teeny tiny commission if you choose to purchase them. Please know that I only recommend products I use and love! Thank you for supporting Elise Rose Crochet! You can read my full (and slightly boring) full disclosure here.
Materials for FREE Amigurumi Duck Pattern
•Worsted Weight Yarn in 3 colors: 2 for the body and 1 for shoes
•3 mm, 3.5 mm or 4 mm Knitting Needles or Double Pointed Needles (Refer to chart on page 2)
•Embroidery floss in black & white
•2 Stitch Holders for holding the sleeves
This post contains affiliates links and at no cost to you I may earn a teeny tiny commission if you choose to purchase them. Please know that I only recommend products I use and love! Thank you for supporting Elise Rose Crochet! You can read my full (and slightly boring) full disclosure here.
Yarns Used
For the body of the ducks I used a light worsted weight yarn and for the clothing I used a sport weight.
My preferred combination for making the ducks is:
Light Worsted Weight Yarn:
- Berroco Vintage – 3.5 oz (100 g) / 218 yds (200 m)
Use any color you like, but I especially like: Buttercream or Snow Day for the body. Citrus for the shoes and Grapefruit for the beak.
For the clothing I recommend:
- Debbie Bliss Baby Cashmerino – 1.8 oz (50 g) / 137 yds (125 m)
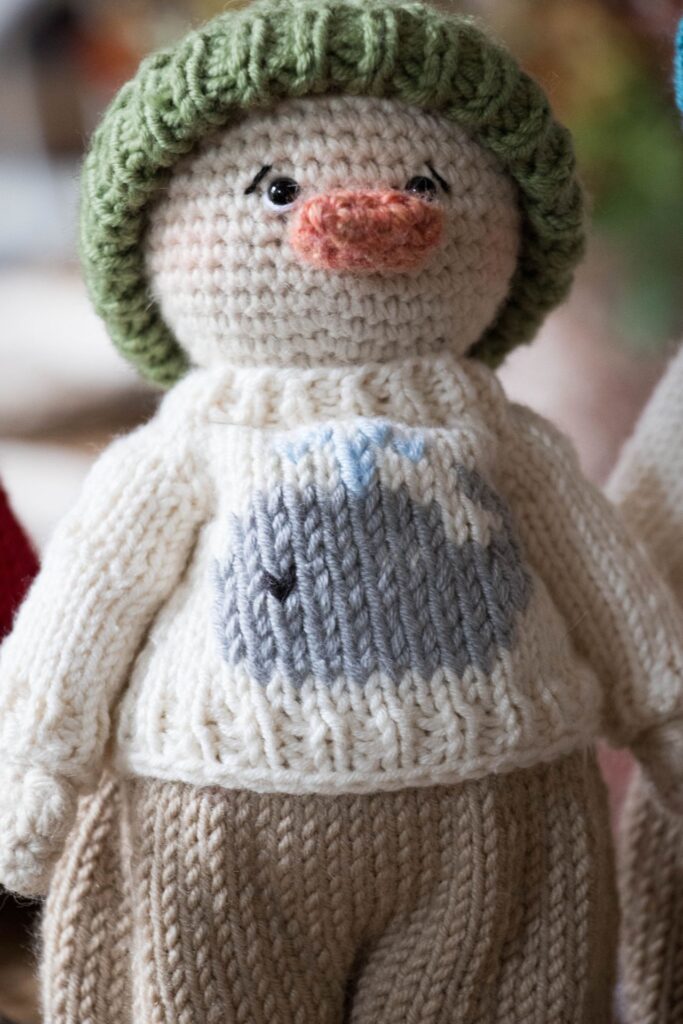
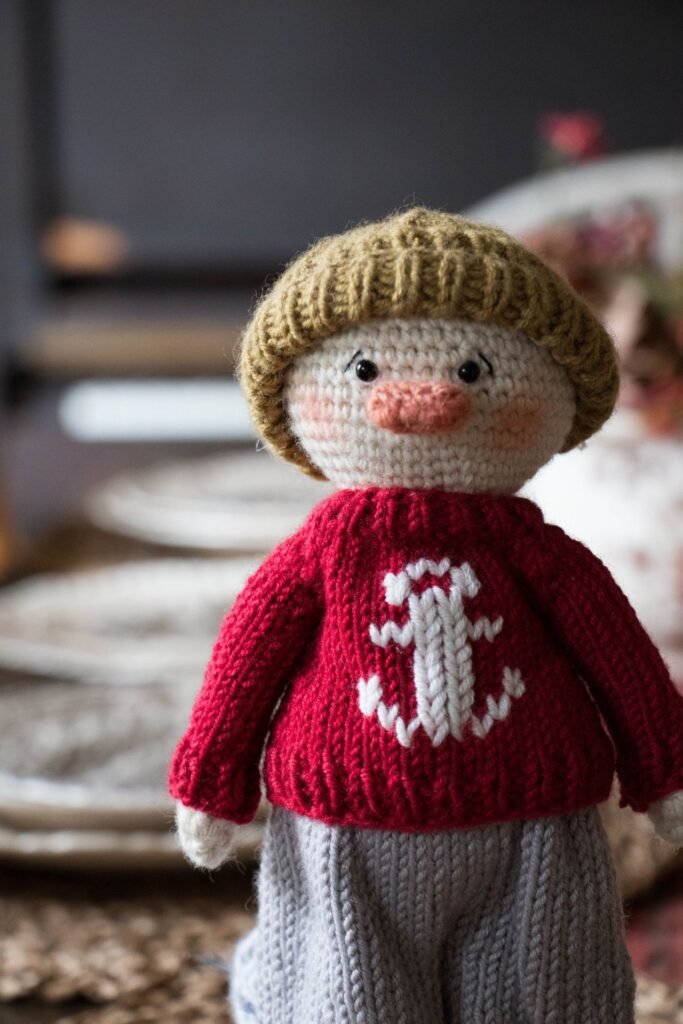
Each of the colors are gorgeous and will look beautiful on your duck. Some of my favorite colors are: White for the sweater, Ruby & Black for the crab, Camel for the pants & Tobacco for the beanie.
Key – Free Amigurumi Duck Pattern Written in US Crochet Terms
ch = chain
st(s) = stitch(es)
slst = slip stitch
sc = single crochet
dc = double crochet
inc = invisible increase = 2 sc in one space
dec = decrease = sc2tog
BLO = back loop only
sc3tog = single crochet 3 together
3 dc bobble = [yarn over, insert hook in stitch, yarn over and draw up a loop, yarn over, draw through 2 loops on hook] three times in same stitch, with four loops on hook yarn over and draw through all 4 loops
kfb = knit front and back
pm = place marker
k2tog = knit two together
yo = yarn over
Finished Size
Using the listed yarn, hook size and my personal gauge, the duck is 10 inches tall and 3 inches wide at the hips.
Notes on FREE Amigurumi Duck Pattern
The duck is crocheted using continuous rounds.
Mark the beginning of each round with a stitch marker.
Keep an accurate count of your rounds and number of stitches per round.
The number in front of the stitch abbreviation stands for how many stitches worked. For example: “6 sc” would mean “work one sc in each of the next 6 stitches”.
The number in brackets at the end of a round indicates how many stitches you should have after working that round.
The best way to stuff is to add a little at a time as you are making the duck.

FREE Amigurumi Duck Pattern
BEAK – With worsted weight color orange:
Ch 5
Round 1: in 2nd ch from hook, 1 sc, (place st marker) 2 sc, work 3 sc in next st, turn to work on opposite side of ch, 2 sc, 1 inc [10]
Rounds 2 – 4 (3 rounds) : sc in each st [10]
Slst to the first st in the round, fasten off. Leave a long tail for sewing the beak to the head during assembly.
Amigurumi Duck Body Pattern
We will start with the shoes beginning with crocheting on the opposite side of the chain. Starting with worsted color yarn for the shoes:
First Leg- (Left Leg)
Ch 5
Round 1: in 2nd ch from hook, 1 sc, (place st marker) 2 sc, work 3 sc in next st, turn to work on opposite side of ch, 2 sc, 1 inc [10]
Round 2: 1 inc, 2 sc, 1 inc, 1 sc, 1 inc, 2 sc, 2 inc [15]
Round 3: 1 inc, 4 sc, 1 inc, 2 sc, 1 inc, 4 sc, 2 inc [20]
Round 4: 7 sc, 1 inc, 2 sc, 1 inc, 9 sc [22]

Round 5: BLO sc in each st [22]
Round 6: 8 sc, 1 inc, 3 sc, 1 inc, 9 sc [24]
Round 7: 1 dec, 20 sc, 1 dec [22]
Round 8: 7 sc, dec 4 times, 7 sc [18]
Round 9: 8 sc, dec 2 times, 6 sc [16]
Round 10: 7 sc, sc3tog, 6 sc [14]
Round 11: 1 dec, 3 sc, 2 dec, 5 sc [11]

Stuff the foot and leg as you work.
Change to leg color.
Round 12: BLO sc in each st [11]
Rounds 13 – 30 (18 rounds): sc in each st [11]
Second Leg – (Right Leg)
Note: Make the second leg the same through round 30
Round 31: Sc 3 times (or as many times as you need to get to the inside of Leg 2).

Sc into the inside edge of Leg 1 to join, add st marker as this will be the new 1st st of the joined round.
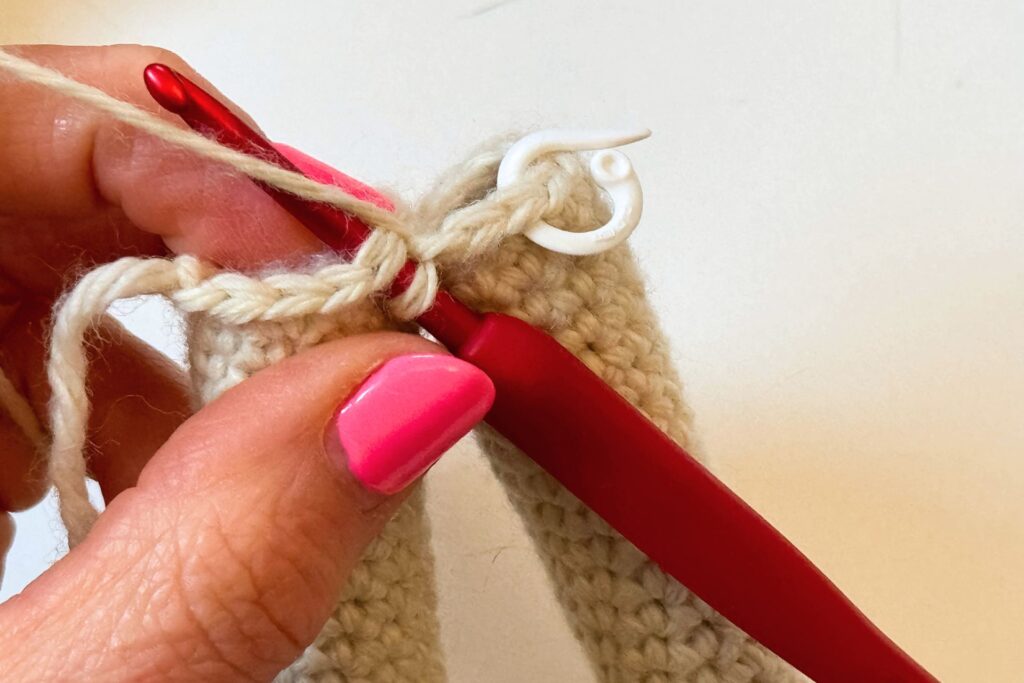
Sc 10 around to finish the round.
Sc into Leg 2 to join and finish round by sc in next 10 sts around [22]
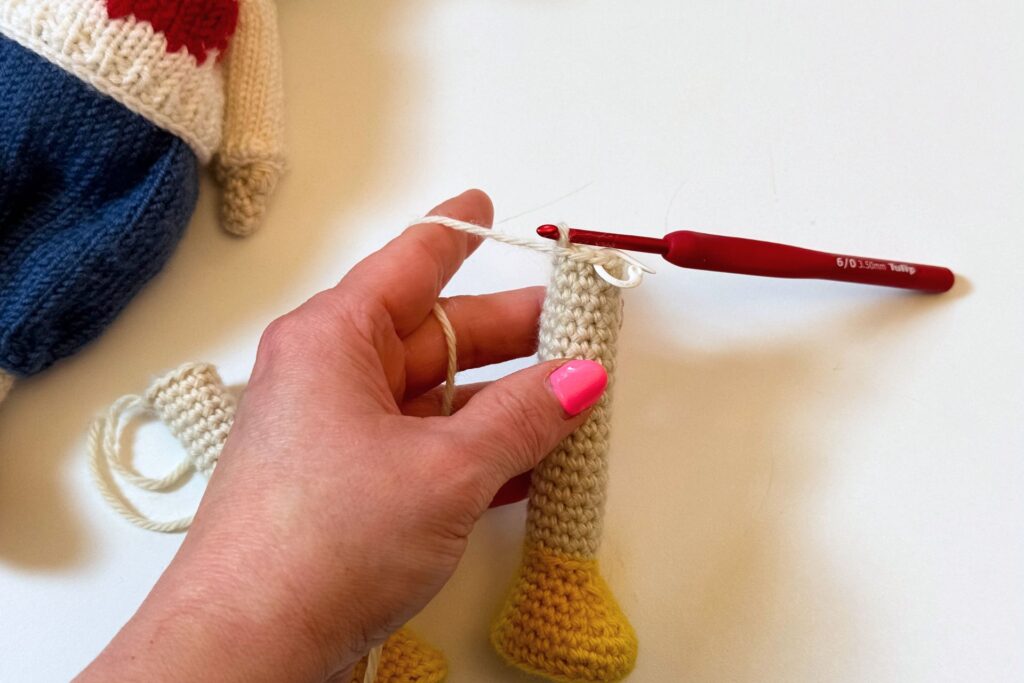
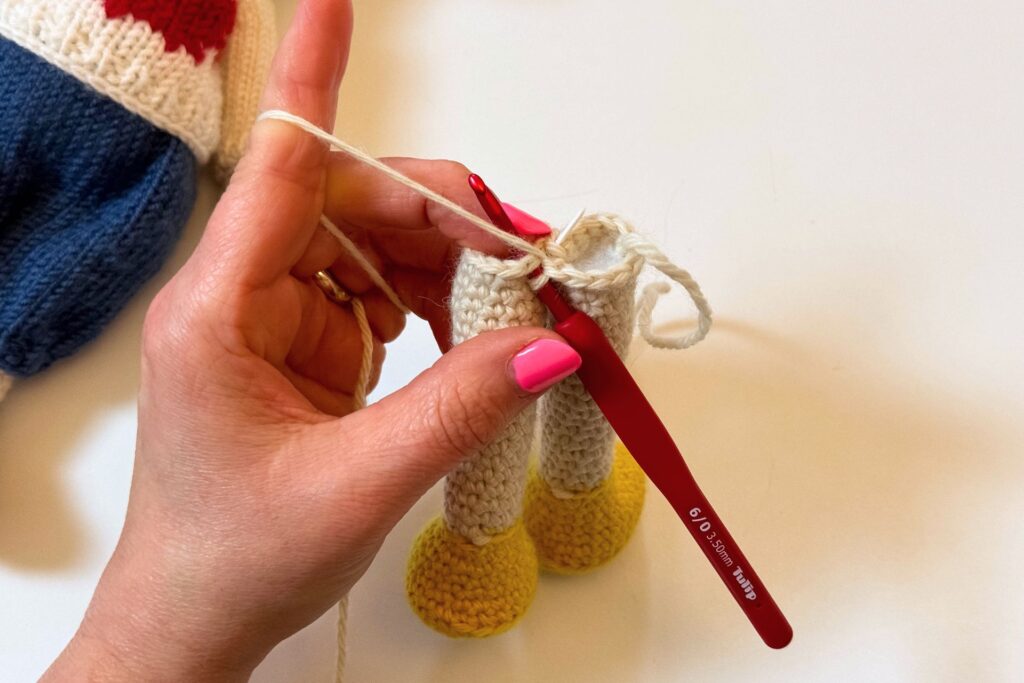
Legs are now joined, we are now onto the body. Stuff the legs firmly and stuff the body as you work.
Round 32: (6 sc, inc) 3 times, 1 sc [25]
Round 33: (4 sc, inc) 5 times [30]
Round 34: (5 sc, inc) 5 times [35]
Round 35: (6 sc, inc) 5 times [40]
Rounds 36 – 39 (4 rounds): sc each st around [40]
Round 40: (6 sc, dec) 5 times [35]
Rounds 41 – 43 (3 rounds): sc each st around [35]
Round 44: (5 sc, dec) 5 times [30]
Round 45 – 47 (3 rounds): sc each st around [30]
Round 48: (4 sc, dec) 5 times [25]
Round 49: sc each st around [25]
Round 50: (3 sc, dec) 5 times [20]
Round 51: sc each st around [20]
Round 52: (2 sc, dec) 5 times [15] – Continue stuffing the body
Round 53: (4 sc, inc) 3 times [18]
Round 54: (5 sc, inc) 3 times [21]
Round 55: (6 sc, inc) 3 times [24]
Round 56: (3 sc, inc) 6 times [30]
Round 57: (4 sc, inc) 6 times [36]
Round 58: (5 sc, inc) 6 times [42]
Rounds 59 – 66 (8 rounds): sc in each st [42]
Round 67: (5 sc, dec) 6 times [36]
Add 5 mm safety eyes to Round 62, 4 sts apart.
Round 68: (4 sc, dec) 6 times [30]
Round 69: (3 sc, dec) 6 times [24]
Round 70: (2 sc, dec) 6 times [18]
Round 71: (1 sc, dec) 6 times [12]
Round 72: dec around [6]
Make sure the head is well stuffed before closing.
Fasten off, take needle through the FLO of each 6 st and pull tight to close. Weave in ends.
Attach the beak just below the eyes at Round 61, centered between the eyes.
Amigurumi Duck Arms Pattern
ARMS (make 2):
Make 5 sc in a magic ring
Round 1: (1 sc, inc) two times, sc in last st [7]
Round 2: sc each st [7]
Round 3: 2 sc, 3 dc bobble, 4 sc [7]
Rounds 4 – 19 (16 rounds): sc in each st around [7] (Stuff the arms as you work)
Leave the top 1/3 of the arm unstuffed near the shoulder.
Sl st to the first st in the round, bind off. Leave a long tail for sewing arms to the sides of the body.
Attach the arms to round 49 on each side of the body.
Amigurumi Duck Knitted Sweater Pattern
KNITTED SWEATER (Duplicate Stitch color work charts on following pages)
With long tail cast on, cast on 32 st evenly on DPNs and work continuously or use the magic loop.
Rounds 1 – 3 (3 rounds): (k 1, p 1) around [32]
Round 4: (k 3, kfb) 8 times [40]
Round 5: k 14, (pm), k 6 (pm), k 14 (pm), k6 [40]
Round 6: kfb, k 12, kfb, (pm) kfb, k 4, kfb, (pm) kfb, k 12, kfb, (pm) kfb, k 4, kfb [48]
Round 7: knit around [48]
Round 8: kfb, k 14, kfb, (pm) kfb, k 6, kfb (pm) kfb, k 14, kfb (pm) kfb, k 6, kfb [56]
Round 9: knit around [56]
Round 10: k 18, place 10 st on holder, k 18, place 10 st on holder [36]
(Held stitches will be used for sleeves later)
Make sure to mark the beginning of your round.

Round 11: knit around [36]
Round 12: k 17, kfb, k 1, kfb, k 15, kfb [39]
Round 13: k 1, Kfb, knit 37 [40]
Rounds 14 – 15 (2 rounds): knit around [40]
Round 16: k 18, kfb, k 1, kfb, k 17, kfb, k 1 [43]
Round 17: kfb, knit 42 [44]
Rounds 18 – 19 (2 rounds): knit around [44]
Round 20: k 20, kfb, k 1, kfb, k 19, kfb, k 1 [47]
Round 21: kfb, k 46 [48]
Rounds 22 – 23 (2 rounds): knit around [48]
(Optional) Change to 2.75 or 2.5 mm needles.
Rounds 24 – 26: (k 1, p 1) repeat around [48]
Fasten off weave in ends.
Choose motif and duplicate stitch on front center of sweater.
Knitted Sweater Sleeves
SLEEVES: beginning with main color of sweater
Pick up 10 st on the stitch holder on 2 needles, with the third needle pick up 4 stitches around the bottom of the arm hole.
Keep a long tail when adding new yarn to sew the hole underneath the sleeves.
Rounds 1 – 16 (16 rounds): knit [14]
(Optional) Change to 2.75 or 2.5 mm needles.
Rounds 17 – 19 (3 rounds): (k 1, p 1) around
Fasten off and weave in ends.
Use the long tail from the beginning to close any holes at the underarm area.

Knitted Pants on Double Pointed Needles or Magic Loop
Cast on 32 sts evenly across 4 needles or on Magic Loop and work continuously.
Rounds 1 – 4 (4 rounds): (k 1, p 1) around [32]
Round 5: kfb in each st [64]
Rounds 6 – 9 (3 rounds): knit around [64]
Round 10: k 62, bind off 2 [64] (you are making the hole for the tail)
Round 11: bind off 2 st, k the rest
Round 12: make 4 sts, k the rest [64]
Rounds 13 – 21 (9 rounds): knit around
Round 22: k 2, place next 32 st on holder, place 32 remaining sts on three DPNs, k across all st, join in the round for first leg hole.
Rounds 23 – 34 (12 rounds): knit around [32]
Round 35: (k2tog, k 2) 8 times [24]
Rounds 36 – 38 (3 rounds): (k 1, p 1) around [24]

Fasten off and weave in ends.
SECOND LEG OF PANTS – keep a long tail when adding new yarn for second leg to sew the hole between the legs closed.
Take stitches off of holder and place on 3 DPNs
Round 22: knit all st, join in the round [32]
Rounds 23 – 34 (12 rounds): knit around [32]
Round 35: (k2tog, k 2) 8 times [24]
Rounds 36 – 38 (3 rounds): (k 1, p 1) around [24]
Bind off and weave in ends.
Use long tail from adding second leg to sew the hole between the legs closed.
Tail – Crochet
TAIL – Crocheted with color of body
Make 5 sc in a magic ring.
Round 1: (1 sc, inc) two times, sc in last st [7]
Round 2: 2 sc, 3 inc, 2 sc [10]
Round 3: sc around [10]
Use the hole of the knitted pants as a guide for where to place the tail.
Beanie Pattern – Knit
Starting with beanie color of sport weight yarn:
Cast on 52 sts evenly across DPNs or on magic loop and work continuously.
Rounds 1 – 14 (14 rounds): (k 1, p 1) around [52]
Round 15: knit around [52]
Round 16: (k 11, k2tog) 4 times [48]
Round 17: knit around [48]
Round 18: (k 4, k2tog) 8 times [40]
Round 19: knit around [40]
Round 20: (k 3, k2tog) 8 times [32]
Round 21: knit around [32]
Round 22: (k 2, k2tog) 8 times [24]
Round 23: knit around [24]
Round 24: (k 2, k2tog) 6 times [18]
Round 25: knit around [18]
Round 26: (k 1, k2tog) 6 times [12]
Round 27: knit around [12]
Round 28: (k2tog) 6 times [6]
Round 29: knit around [6]
Fasten off, take needle through the FLO of each 6 st and pull tight to close. Weave in ends.
Details
•Add a line underneath each eye with white embroidery floss.
•Add eyebrows using one or two strands of black embroidery floss.
Video Tutorial
Copyright
©2024 Elise Rose Crochet, Elise Speed. All rights reserved. This pattern is for personal use only. This pattern or any parts may not be reproduced, distributed, resold, translated, published or posted in any way either online or print.
You have permission to sell hand finished Three Little Ducks toys on a limited basis. Please add “Designed by Elise Rose Crochet” on listing information as well as any tag attached to the toy.
Pin for Later