Knitting Toys 101: Cable Cast On and Blocking
The cable cast on is a fundamental skill that you will need to master to hand knit toys. Today I’m going to show you how to do it and share a little about the importance of blocking!
Conversation with a Bunny
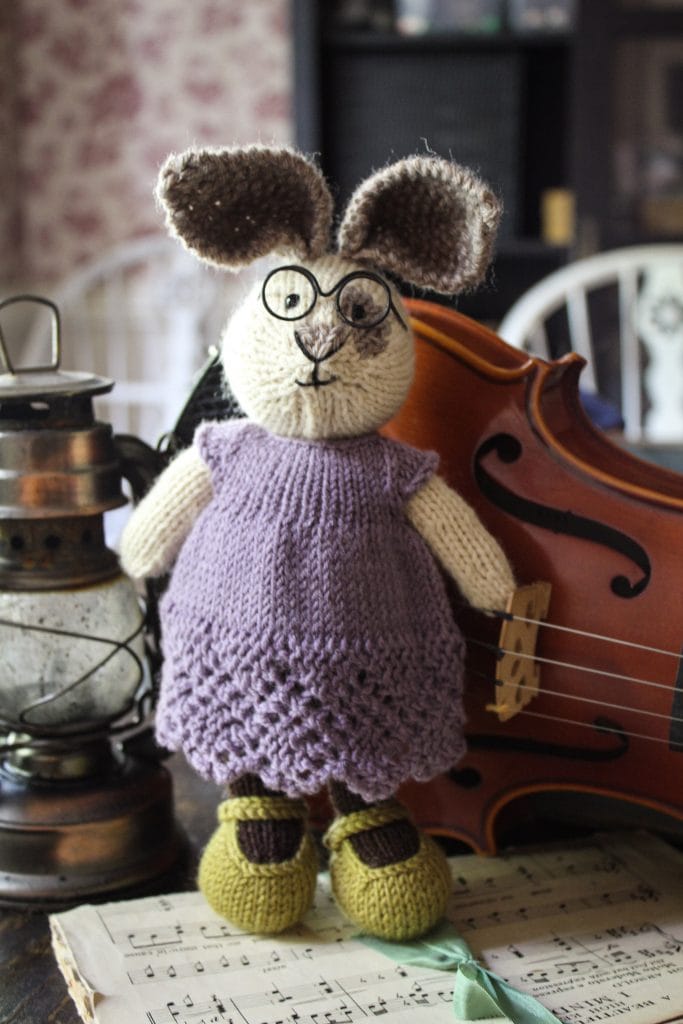
Bunny: So there’s a rumor going around that you want to learn how to make me.
You: Who told you that? Wait…you can talk?
Bunny: Of course I can talk! You think I’m just some dumb animal? I also heard that you think knitting toys is too hard.
You: Well that’s definitely true. It looks so complicated.
Bunny: It’s not complicated, but there are skills you need to learn. By the way, you got any carrots?
It is a well known fact that bunnies have very short attention spans so I think I’ll take over from here.
This post contains affiliate links and at no cost to you I may earn a teeny tiny commission if you choose to purchase any of these supplies. Please know that I only recommend products I use and love! Thank you for supporting Le Petit Saint Crochet!
Cable Cast On
It makes a firm, less stretchy edge that is perfect when there is no ribbing at the beginning of your project.
Jimmy Beans Wool
The cable cast on is a fantastic method of casting on particularly for toys. Because it has a less stretchy edge it keeps everything nice, tight, and in place. But I had a terrible time with it in the beginning and thought I would never be able to do it. Then I realized a little secret.
Keep the Cable Cast On Loose
Seriously, do yourself a huge favor and think loose. I’m a naturally tight knitter and crocheter so originally I was doing this with my regular tension and I couldn’t understand why it was so hard. I finally realized that I needed to loosen up, way up. Once I tried that I had no issues whatsoever.

Benefits of Cable Cast On
Besides being a less stretchy cast on it also has another major benefit. You don’t have to figure out how long your cast on tail should be, like you do with a long tail cast on. Your tail can be as long or as short as you need it to be, which is really nice. Generally when you are crocheting amigurumi or hand knitting toys you want to leave a longer cast on and cast off tail so you can use them to seam parts closed and body parts together.
If you would like to learn how to read patterns please visit my blog post: How to Read a Crochet Pattern
How To Make a Cable Cast On
The easiest way to learn how to do this is to watch my YouTube video but I will attempt to describe it as well in case you aren’t able to watch it. Please note that I am right handed.
- Create a slip knot.
- Insert your left needle into the slip knot.
- Take your right needle and insert it knit wise (from the left of the stitch to the back)
- Wrap your yarn around the right needle (from the left over the top)
- Pull the loop through
- You now have one stitch on your left needle (the original slip knot) and one on your right
- Pull right hand stitch until it is a large loop
- Take your left needle from underneath the right loop and slip loop off the right hand needle onto the left.
- You now have two stitches on your left needle.
- Insert your right needle between the two stitches.
- Wrap your yarn around the right needle point as before.
- Pull the loop through.
- Take your left needle from underneath the right loop and slip off the right hand needle onto the left.
- Lather, rinse, repeat until you have the desired number of stitches. Your slip knot counts as a stitch.


I highly encourage you to watch the video as it makes more sense than written out with photographs.
Importance of Blocking

Another little trick that will take your toys from cute to absolutely adorable is to block the clothing.

Blocking is the process of wetting, pressing, or steaming finished knit pieces to give them their permanent size and shape. You should give this process as much care and attention as you do to knitting the pieces.
Vogue® Knitting The Ultimate Knitting Book: Completely Revised & Updated
I do not block any part of the animal I am knitting. They just don’t need it, but trust me, the clothing does. Blocking the clothes will take a hand knit bunny dress from drab to dazzling!
There are two different types of blocking, wet and steam. I use both but recently have been trying steam blocking with great success.

Blocking with Water
For blocking with water I just spray the piece with filtered water from a spray bottle. Be sure that your spray bottle has never contained chemicals that could damage your fabric. I then lay the clothing on the blocking board and pin it into shape. Be sure to smooth any wrinkles and keep your edges straight. The blocking board that I own has one inch squares so I can easily measure lengths and keep the piece even and symmetrical.
This is the blocking mat I have and it also comes with plenty of rust proof pins.

Blocking with Steam
When blocking with steam I use the same method as blocking with water with one exception. Instead of spraying the piece with water I use an iron to steam the piece. I never ever place the iron directly on the fabric but hold it above and give bursts of steam. Make sure that your iron does not spray out any rust beforehand otherwise your piece could be ruined.
Pay particular attention to the heat setting of your iron. Certain yarns need warmer or cooler temperatures depending of their fiber content. An acrylic yarn could melt under extreme heat and a linen may need your highest setting. Do a little research by reading your yarn label before putting heat on your hard work!
Vogue Knitting

Finally, I want to introduce you to a reference material that I believe will be in my library from now until the end of time. Vogue® Knitting The Ultimate Knitting Book: Completely Revised & Updated has already become my go-to book for information about anything knitting related. I have already learned so much about yarns, knitting techniques, and garment construction. Seriously, if you are interested in knitting get this book. Just between you and me, at night I take it to bed and read it like a novel. It’s not only gorgeous but is so informative.

Materials
You will need a handful of items to be able to knit this little bunny.
- You will need the pattern from Little Cotton Rabbits. I used the Girl Bunny pattern. (The dress above is from her Seasonal Dresses Pattern but for now let’s just focus on the one from the Bunny Pattern) You can buy them on Etsy or on her Ravelry page.
- You will also need knitting needles. These are my favorite brand and the pattern will give you all the info you need to purchase the correct sizes, there are more than one. addi Knitting Needle Circular Turbo Rocket Lace Skacel Exclusive Blue Cord 32 inch (80cm) Size US 2 (3.0mm)
- You will also need yarn for the head, body, and clothes. The pattern will give you specific information about how many colors and weights. These are links to the brands I’m currently using. Berroco Vintage Yarn (5101) Mochi. Vintage-5116 Dove Debbie Bliss Baby Cashmerino – 91 Acid Yellow
Let’s Keep in Touch
I would love to hear from you! Are you interested in knitting toys? Have you ever tried the cable cast on? Do you regularly block your pieces? I want to know it all! Drop a comment below! I love learning about those of you who stop by for a visit!
Pin Me!


You could make little eye glasses out of wire….
Thanks so much! I have tried to make them before and I just can’t get them quite so nice. Maybe I just need to practice!
Your work is beautiful. I too crochet, just starting to get into knitting. I use to crochet tight too but with some conscious effort I have got a handle on my tension. I will have to look into the Vouge book. I’m interested in learning to knit beyond the knit stitch.
Thank you so much! I highly recommend the book! It is extremely informative!
So ADORABLE! I love the dress!! Have to try this out myself for my daughter.
Thanks so very much! Knitting toys is so much fun!
Great tips! Knit amigurumi are definitely something I’m headed towards learning! I bought the Vogue book and began teaching myself to knit. Currently making a scarf, so pretty basic. I think that I’ll need to master the increase and decrease next!
Isn’t the Vogue book fantastic? I love knitting toys so very much! I think you’ll like it too! 💗
Great tips, thank you! Wondering if you would consider doing a video on the under arms/making of the cap sleeves for the dresses? I always have the most difficult time trying to make the dress look nice there and I just cannot seem to get it to look good. I end up with a long stitch on one underarm. It’s very frustrating.
I have that same issue! Unfortunately I’m not able to share anything specific to a pattern since it is copyrighted material. There’s a great Little Cotton Rabbits Facebook group that you could ask that question as well! You will probably get great answers there! Make sure it’s the group that says “Official” in the name. ðŸ°ðŸ°ðŸ°