Amigurumi Boy Doll FREE Crochet Pattern & Video Tutorial
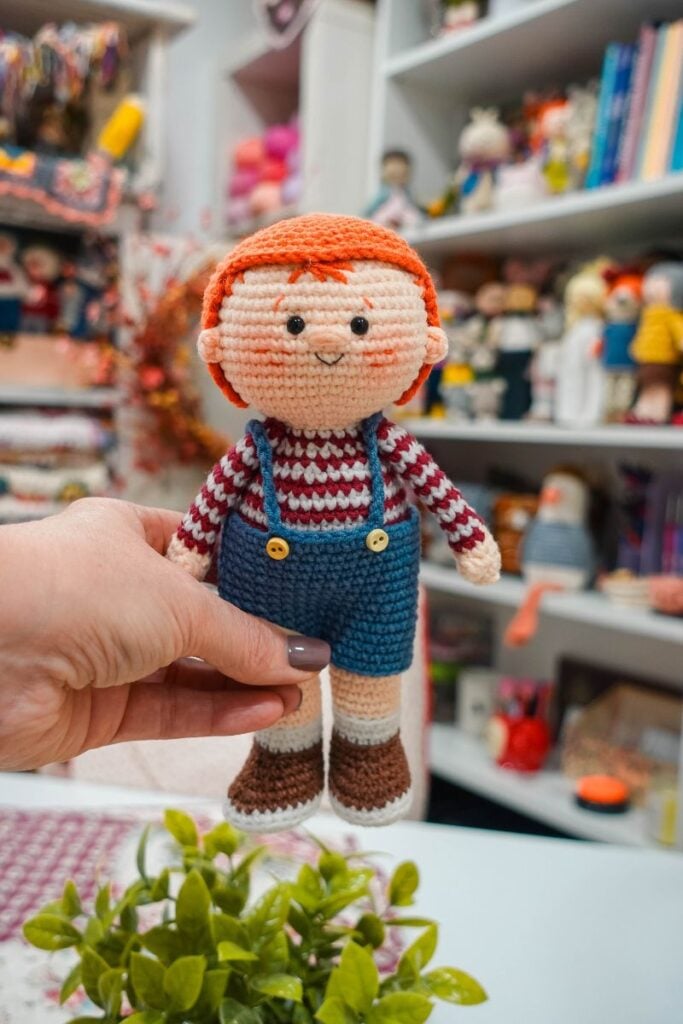
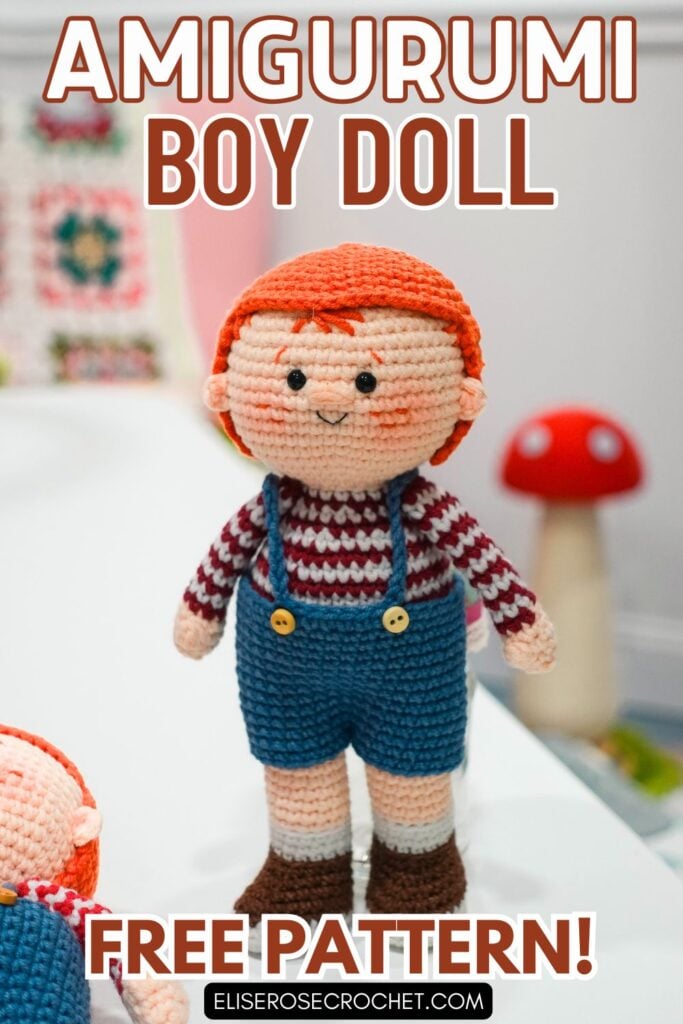
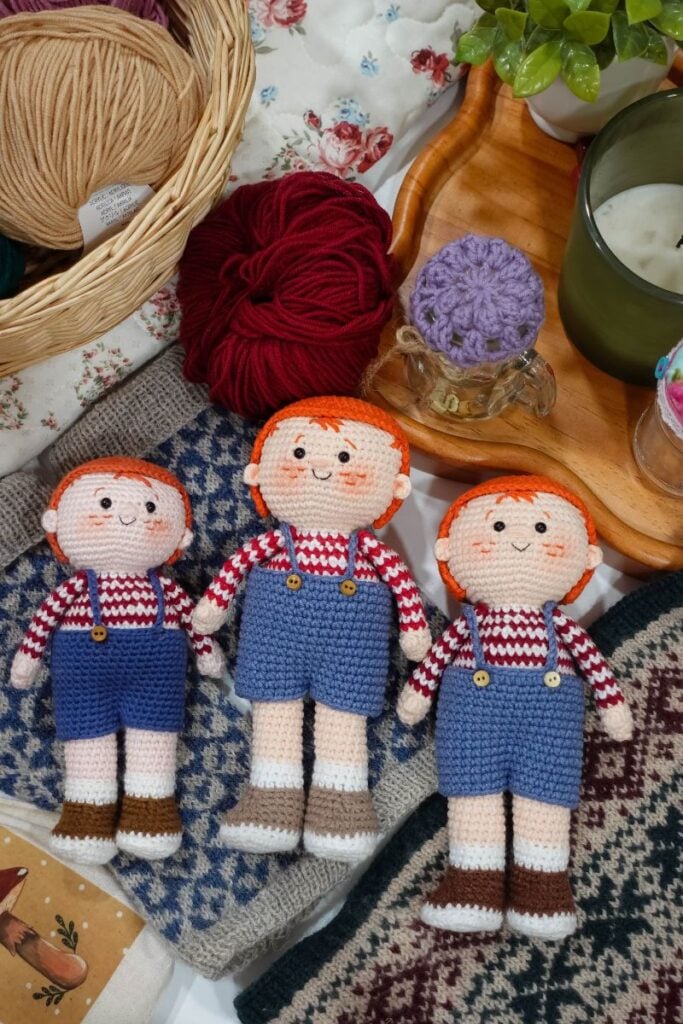
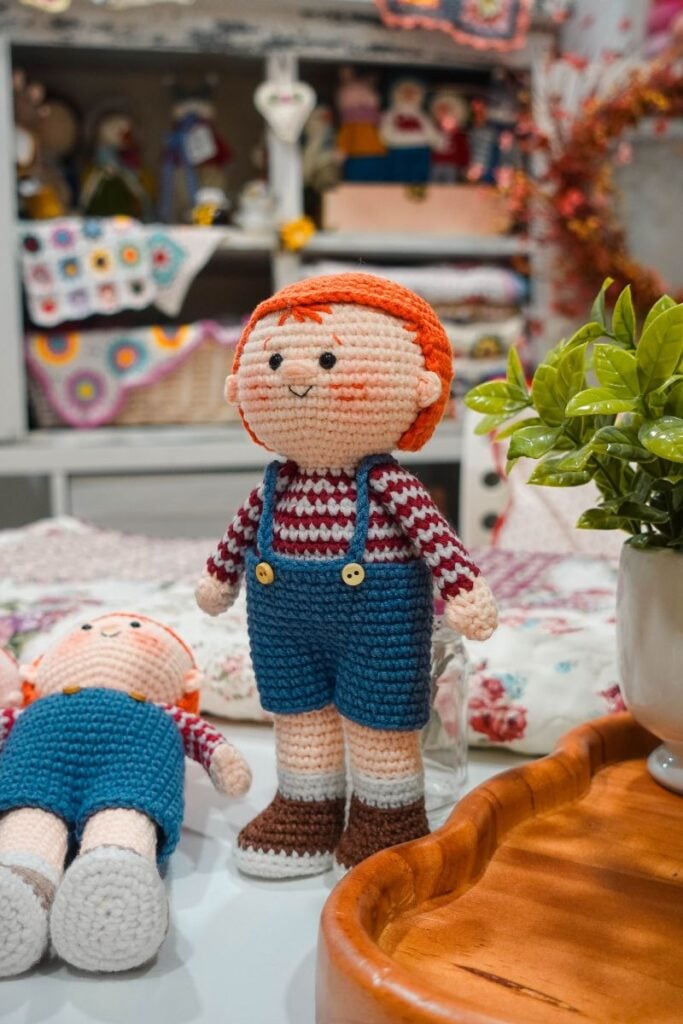
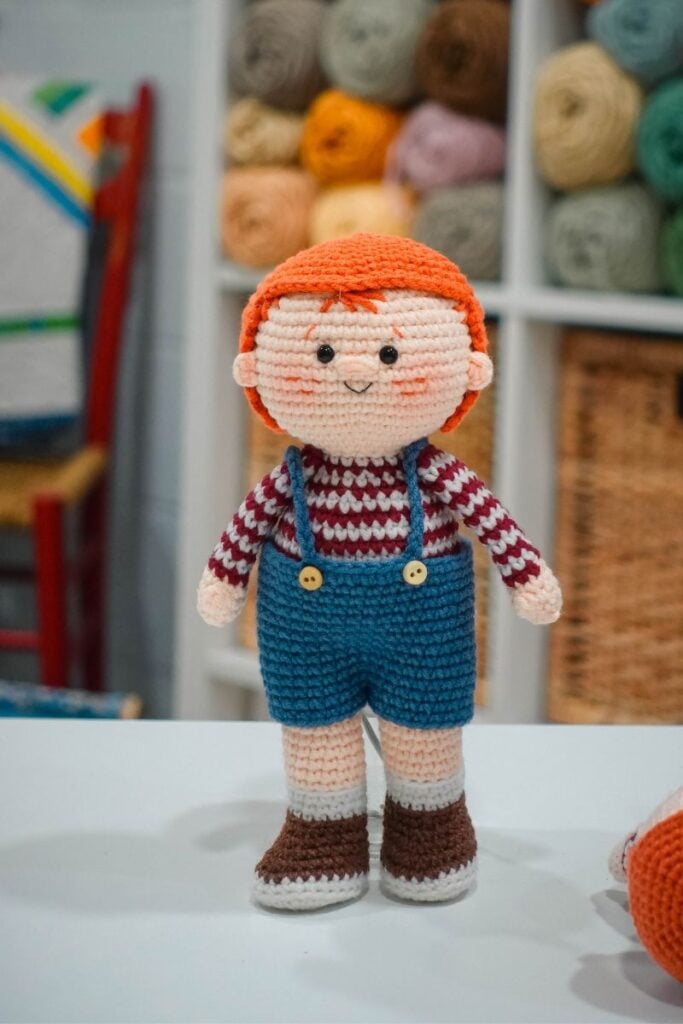
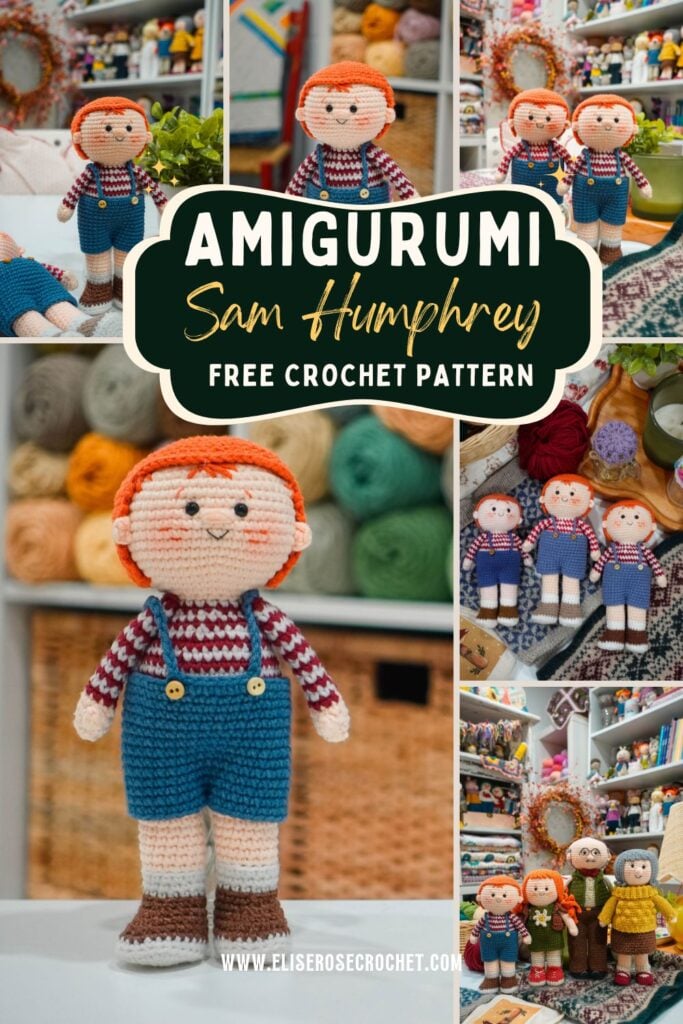
Crochet your very own amigurumi boy doll with this free pattern and step-by-step video tutorial! Perfect for intermediate crocheters, this charming project features adorable details like his bright red hair, red-and-white striped shirt, blue overalls, and little brown shoes.
You’ll find the full written pattern, complete supply list, and plenty of helpful tips to guide you every step of the way.
FREE Crochet Pattern: Amigurumi Boy Doll
In this post, you’ll find the full free written pattern plus a step-by-step video tutorial to guide you through every stitch. Perfect for intermediate crocheters, you’ll practice classic stitches like the magic ring, single crochet, and double crochet while bringing Sam Humphrey to life.
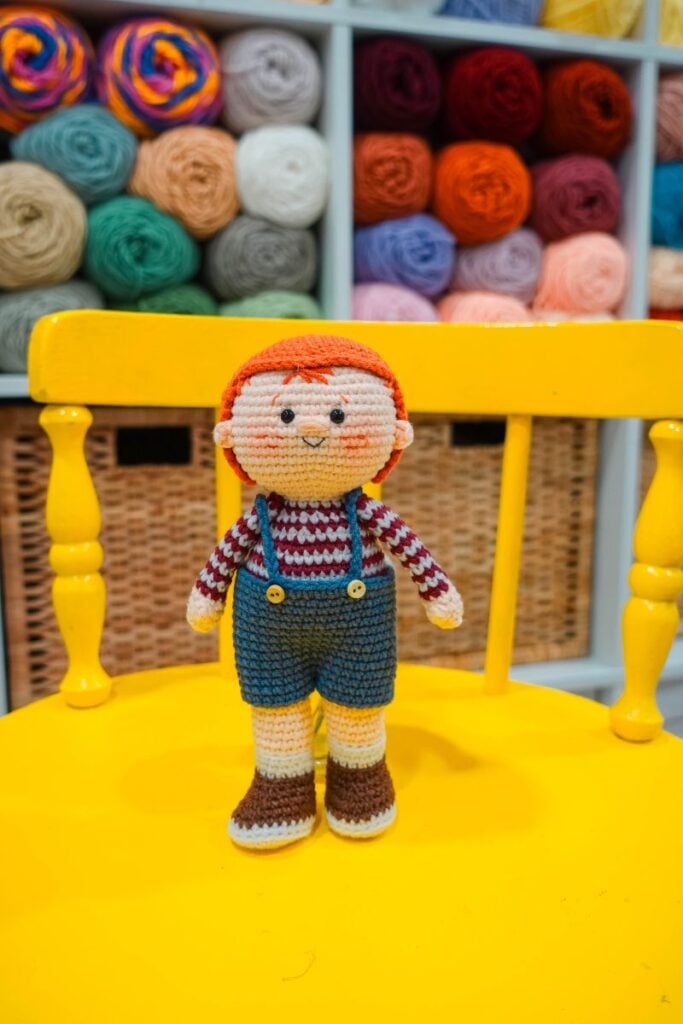
What you’ll need: Sport weight yarn in six colors, a 2.5 mm crochet hook, safety eyes, stuffing, and a yarn needle. I’ve also included tips for adjusting clothing fit, so your doll turns out just right.
Whether you’re making him as a gift, adding him to your handmade collection, or crocheting just for fun, this amigurumi doll will be a project full of personality.
Who Is Sam Humphrey?
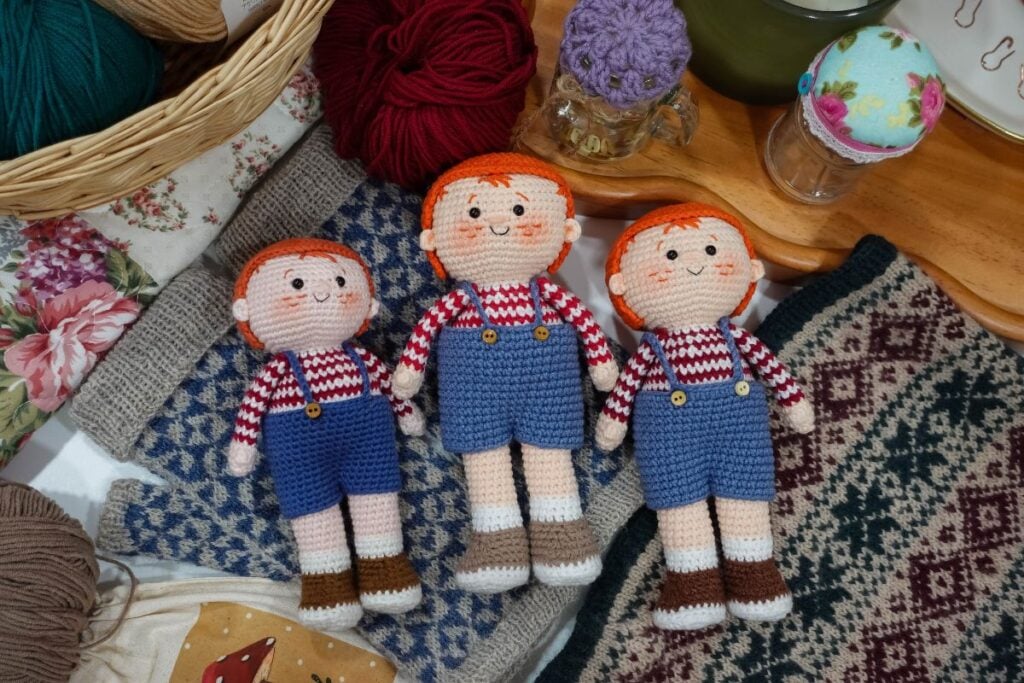
Sam Humphrey is a happy boy who always has a baseball in his hand or a frog in his pocket. He has a knack for finding adventure wherever he goes, and animals of every kind seem to know that Sam is a friend. When he’s not exploring the great outdoors, Sam can usually be found in his grandfather’s kitchen, hoping for a fresh batch of chocolate chip cookies. His seemingly endless appetite has earned him the affectionate nickname “the bottomless pit,” and Grandpa Humphrey is always happy to oblige!
Check Out the FREE Amigurumi Grandma Pattern Here
Check Out the FREE Amigurumi Grandpa Pattern Here
Check Out the FREE Sally Humphrey Amigurumi Doll Pattern Here
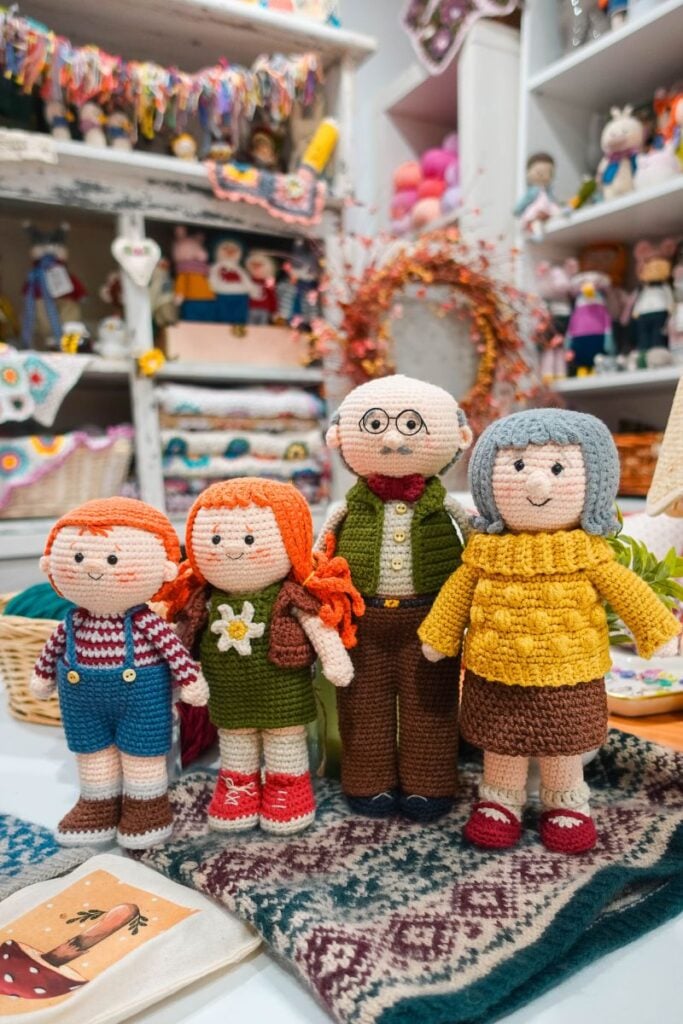
Thank you so very much for crocheting the Sam Humphrey amigurumi doll pattern. My sincerest hope is that you enjoy every minute of your toy making process.
This pattern is standard to most amigurumi toys. We will be crocheting in continuous rounds. The boy doll amigurumi pattern is meant for intermediate crocheters.
Remember that toy making is a process. It doesn’t have to be perfect and every toy you make will be an opportunity to improve your skills. I’ve learned something from every toy I’ve made.
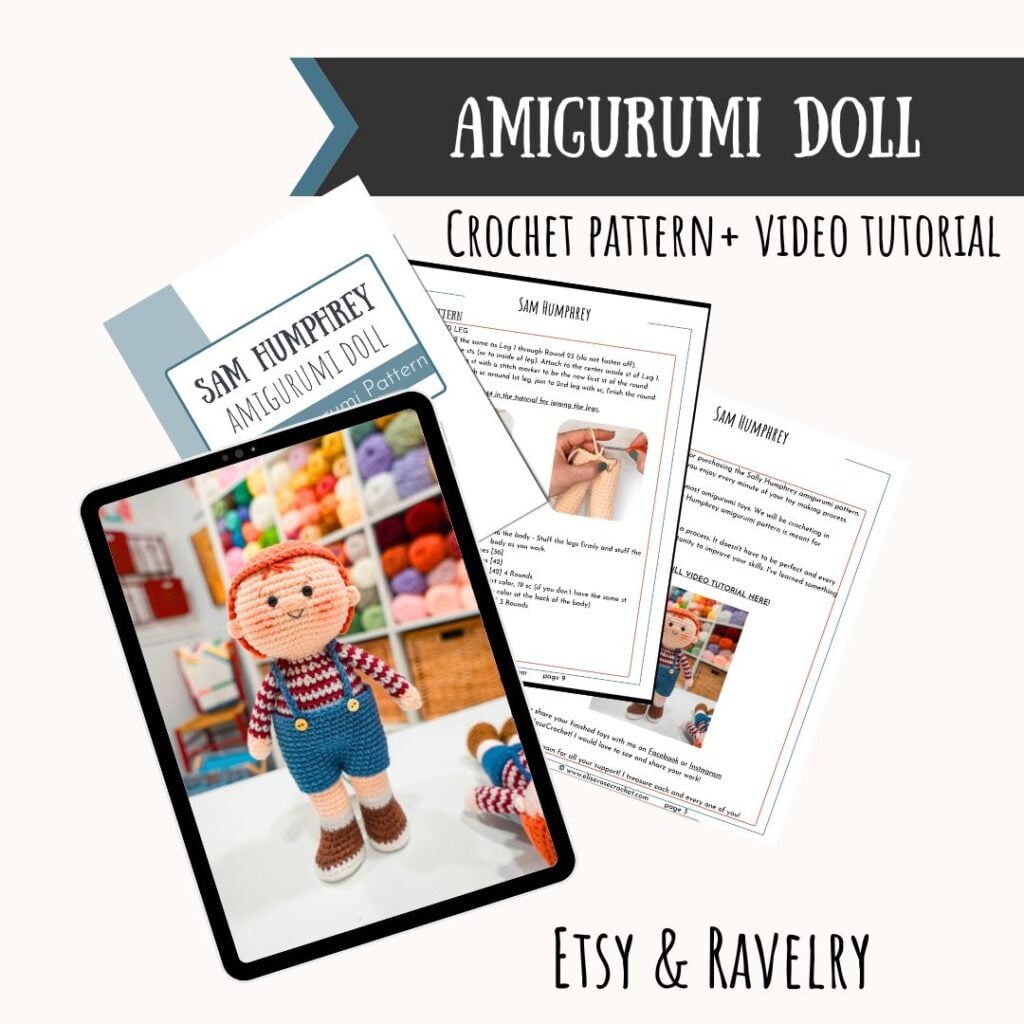
FIND THE FULL VIDEO TUTORIAL HERE
Amigurumi Doll Sizes
Sam Humphrey is 7.5 inches (19 cm) long when using a 2.5 mm crochet hook and YarnArt Jeans yarn. He may be a little larger or smaller depending on your personal tension.
If you would like to change the size of your toy, use a heavier/lighter weight yarn and adjust your crochet hook size. For example, you can make Sam Humphrey with worsted weight yarn and a 3.25 mm hook.
Important Information about Crocheting Amigurumi Clothing
When you are crocheting clothing for amigurumi, you may discover that even when using the same size crochet hook and the same yarn, the clothing may not fit perfectly.
Within yarn brands two different colors may be slightly thicker or thinner and can change the size of the clothing.
Because we are making the clothing to fit the amigurumi toy, not making the toy to fit the clothing, you may need to adjust your crochet hook size.
If the clothing is too large, go down in hook size.
If the clothing is too small, go up in hook size.
This is why I recommend having three crochet hooks for each project: one for the main toy, one larger and one smaller for the clothing.
Materials Needed For an Amigurumi Boy Doll
This post contains affiliate links and at no cost to you I may earn a teeny tiny commission if you choose to purchase them. Please know that I only recommend products I use and love! Thank you for supporting Elise Rose Crochet! You can read my full (and slightly boring) disclosure here.
#2 Sport Weight Yarn in 6 colors
YarnArt Jeans (Fine/Sport weight yarn) in the colors:
- Body = Pinkish/Orange (73)
- Hair = Orange (85)
- Main Shoe = Brown (70)
- Overalls = Blue (68)
- Shoe Bottom & Socks = White (01)
- Shirt A = Red (90)
- Shirt B = White (01)
Or Premier Minikins in 6 colors:
- Main Shoes = Chestnut (37)
- Shoe Bottom & Socks = White (01)
- Body = Bisque (05)
- Hair = Pumpkin (32)
- Overalls = Dungarees (29)
- Shirt A = Brick (17)
- Shirt B = White (01)
5 mm safety eyes – my favorite places to buy are 6060 Eyes or Glass Eyes Online
Yarn Needle for weaving in ends
Fabric Glue OPTIONAL but Highly Recommended for gluing on hair
Key – Pattern Written in US Crochet Terms
- ch = chain
- st(s) = stitch(es)
- slst = slip stitch
- sc = single crochet
- hdc = half double crochet
- dc = double crochet
- inc = increase = 2 sc in one space
- dec = decrease = sc2tog
- BLO = back loop only
- FLO = front loop only
- sk = skip stitches
- sc3tog = single crochet 3 together
- 3 dc bobble = [yarn over, insert hook in stitch, yarn over and draw up a loop, yarn over, draw through 2 loops on hook] three times in same stitch, with four loops on hook yarn over and draw through all 4 loops
Amigurumi Doll Notes
- Sam Humphrey is crocheted using continuous rounds.
- Mark the beginning of each round with a stitch marker.
- Keep an accurate count of your rounds and number of stitches per round.
- The number in front of the stitch abbreviation stands for how many stitches are worked. For example: “6 sc” would mean “work one sc in each of the next 6 stitches”.
- The number in brackets at the end of a round indicates how many stitches you should have after working that round.
- The best way to stuff is to do a little at a time.
- Lightly stuff the lower part of the arms near the hand only.
Sam Humphrey Amigurumi Doll Pattern
First Leg – Shoes and Legs
We will start with the shoes beginning with crocheting on the opposite side of the chain.
FIRST LEG – starting with the bottom of the shoe color
- Chain 5
- Round 1: starting in 2nd ch from hook, 3 sc, make 3 sc in last st, on the other side of the ch, 2 sc, inc [10] (PHOTOS 1, 2 & 3)
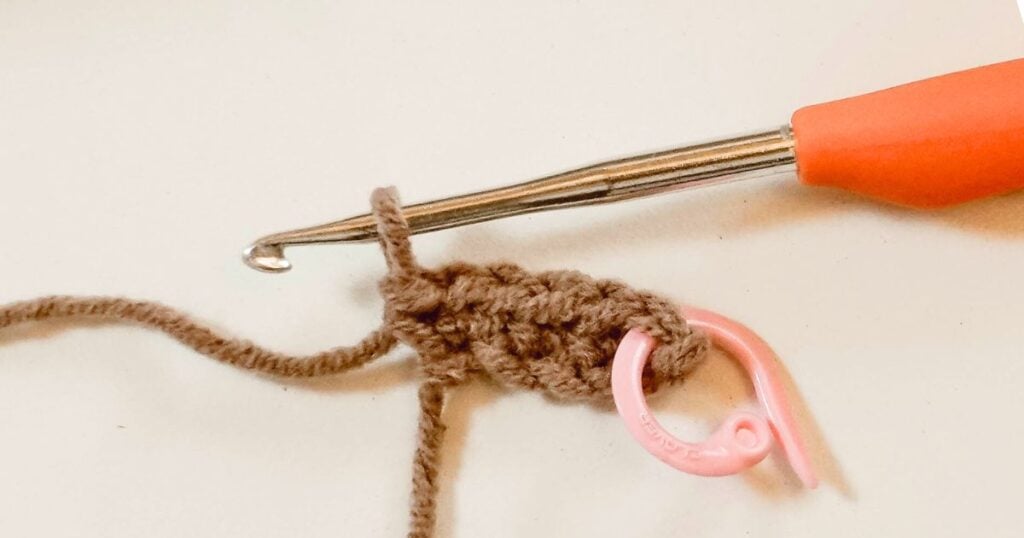
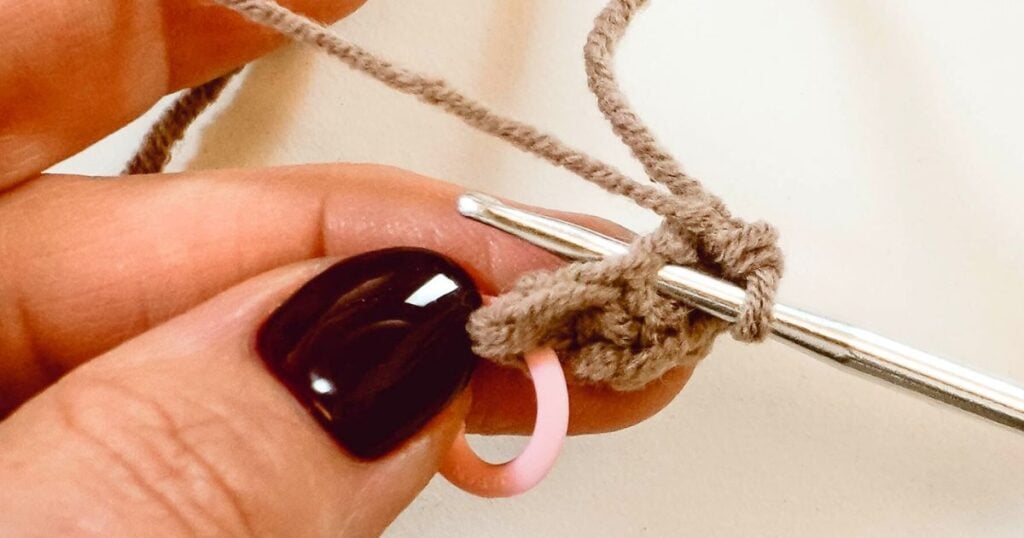
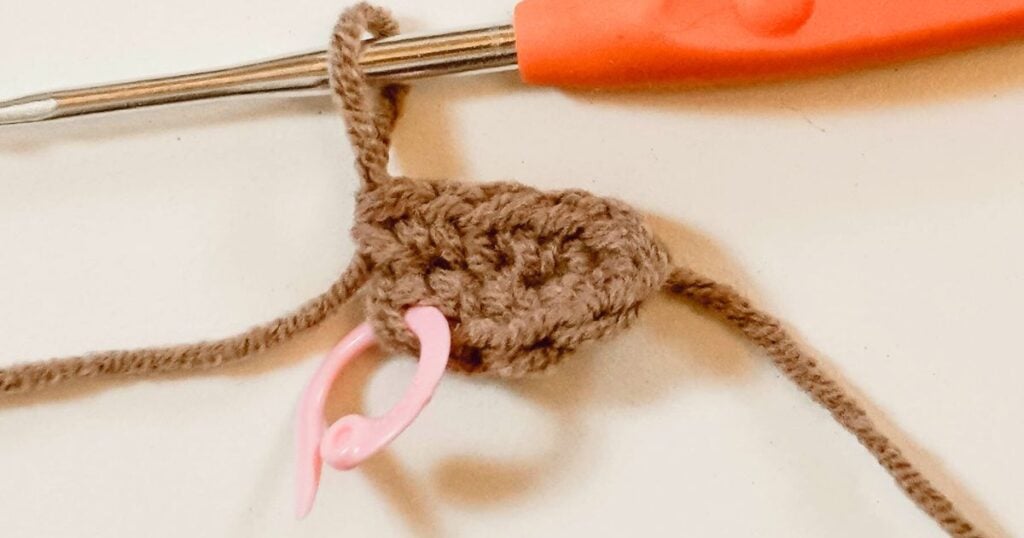
- Round 2: inc, 2 sc, inc, 1 sc, inc, 2 sc, 2 inc [15]
- Round 3: inc, 4 sc, inc, 2 sc, inc, 4 sc, 2 inc [20]
- Round 4: 2 inc, 5 sc, inc, 2 sc, inc, 6 sc, inc, 2 sc [25]
- Round 5: sc in each st BLO [25]
- Change to the main shoe color
- Round 6: 11 sc, inc, 2 sc, inc, 10 sc [27]
- Round 7: 11 sc, 4 dec, 8 sc [23]
- Round 8: 10 sc, 3 dec, 7 sc [20]
- Round 9: 9 sc, 2 dec, 7 sc [18]
- Round 10: 8 sc, sc3tog, 7 sc [16]
- Change to sock color
- Round 11: sc in each st BLO [16]
- Rounds 12 – 13: sc in each st [16]
- Change to skin color
- Round 14: sc in each st BLO [16]
- Rounds 15 – 25: sc in each st [16] 11 Rounds
- Fasten off first leg
Optional shoe support: After Round 9, cut a small piece of cardboard to fit the shoe sole and place it inside for stability. Omit cardboard for toys intended for young children.
Second Leg and Joining the Legs
SECOND LEG
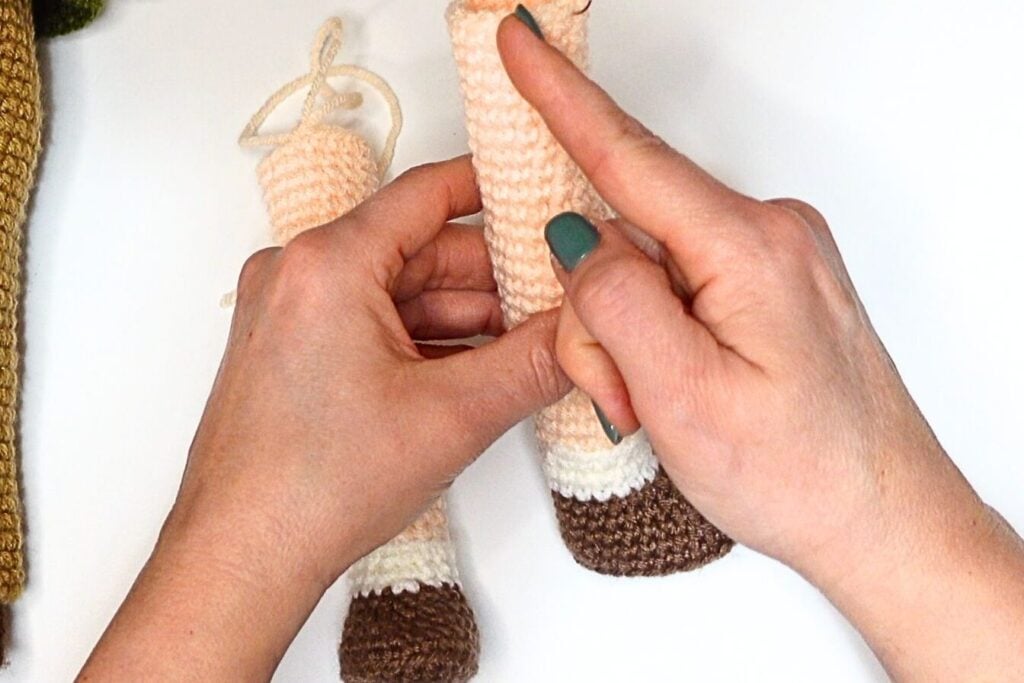
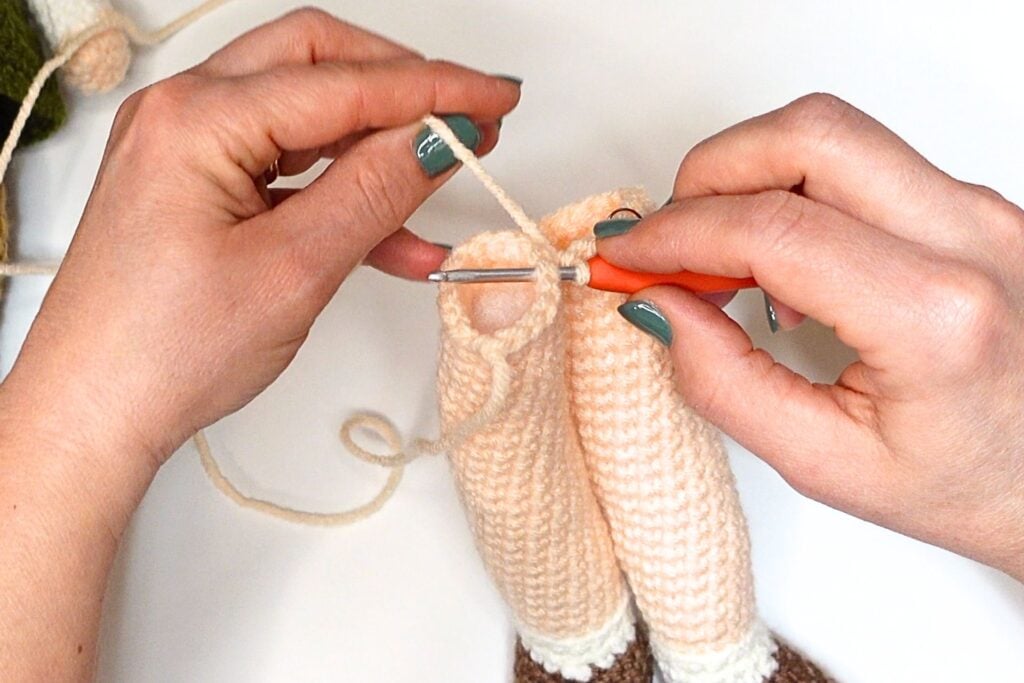
- Make Leg 2 the same as Leg 1 through Round 25 (do not fasten off).
- Make 1-2 more sts (or to inside of leg). Attach to the center inside st of Leg 1.
- Mark the joining st with a stitch marker to be the new first st of the round.
- Round 26: finish sc around 1st leg, join to 2nd leg with sc, finish the round with sc [32]
Body
Legs are joined, we are now onto the body – Stuff the legs firmly and stuff the body as you work.
- Round 27: (7 sc, inc) 4 times [36]
- Round 28: (5 sc, inc) 6 times [42]
- Rounds 29 – 32: sc in each st [42] 4 Rounds
- Round 33: 23 sc, change to shirt color A, 19 sc (if you don’t have the same st count, that’s ok, just change the color at the back of the body)
- Change shirt to color B at the back of the round, alternating color A & color B each round
- Rounds 34 – 36: sc in each st [42] 3 Rounds
- Round 37: (5 sc, dec) 6 times [36]
- Round 38: sc in each st [36]
- Round 39: (4 sc, dec) 6 times [30]
Head
- Round 40: (3 sc, dec) 6 times [24] Stuff the body.
- Round 41: sc in each st [24]
- Round 42: (2 sc, dec) 6 times [18]
- Round 43: 11 sc, change to skin color, 7 sc [18] (if you don’t have the same st count, that’s ok, just change the color at the back of the neck)
- Round 44: sc in each st [18]
- Round 45: inc in each st [36]
- Round 46: (5 sc, inc) 6 times [42]
- Round 47: (6 sc, inc) 6 times [48]
- Round 48: (7 sc, inc) 6 times [54]
- Rounds 49 -57: sc in each st [54] 9 Rounds
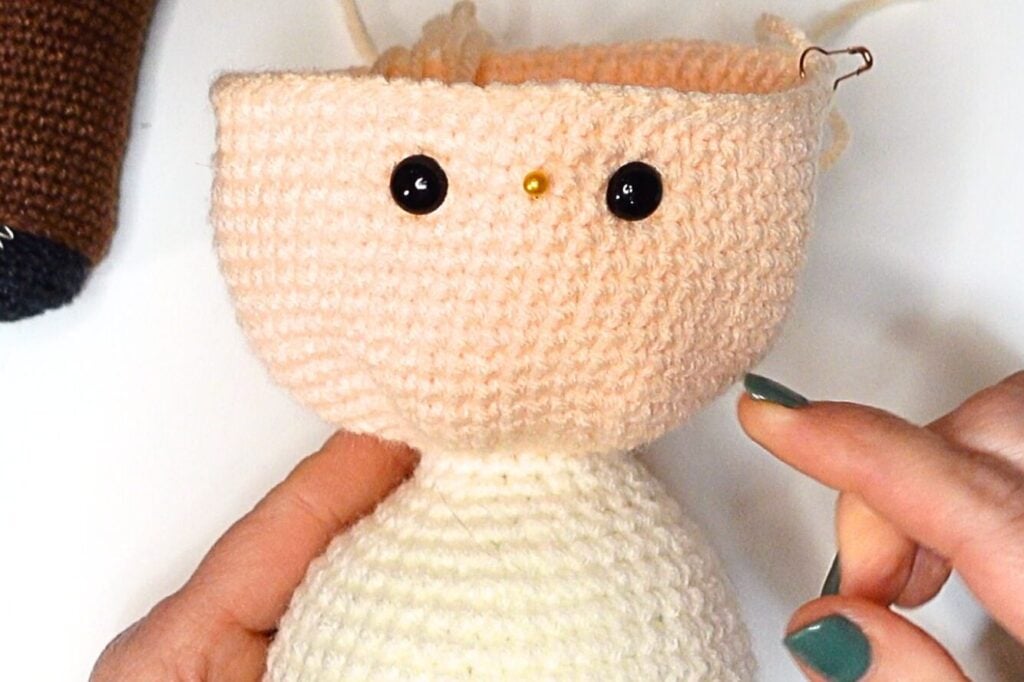
- Attach eyes at round 53, 4 – 5 sts apart
- While the head is still open, this is a good time to embroider the nose, eyebrows, smile, and freckles.
- Round 58: (7 sc, dec) 6 times [48]
- Round 59: (6 sc, dec) 6 times [42]
- Round 60: (5 sc, dec) 6 times [36]
- Round 61: (4 sc, dec) 6 times [30]
- Round 62: (3 sc, dec) 6 times [24]
- Round 63: (2 sc, dec) 6 times [18]
- Round 64: (1 sc, dec) 6 times [12]
- Round 65: dec 6 times [6]
- Fasten off and take needle through FLO of 6 remaining stitches and pull closed.
Arms (Make 2)
ARMS (make 2) – with skin color
- Make 6 sc in magic ring
- Round 1: (1 sc, inc) 3 times [9]
- Round 2: sc in each st [9]
- Round 3: 1 sc, 3 dc bobble, 7 sc [9]
- Round 4: sc in each st [9]
- Change to shirt color, alternating each Round between color A and B
- Rounds 5 – 17: sc in each st [9] 13 Rounds
- Fasten off and leave a long tail for seaming. Attach at round 42.
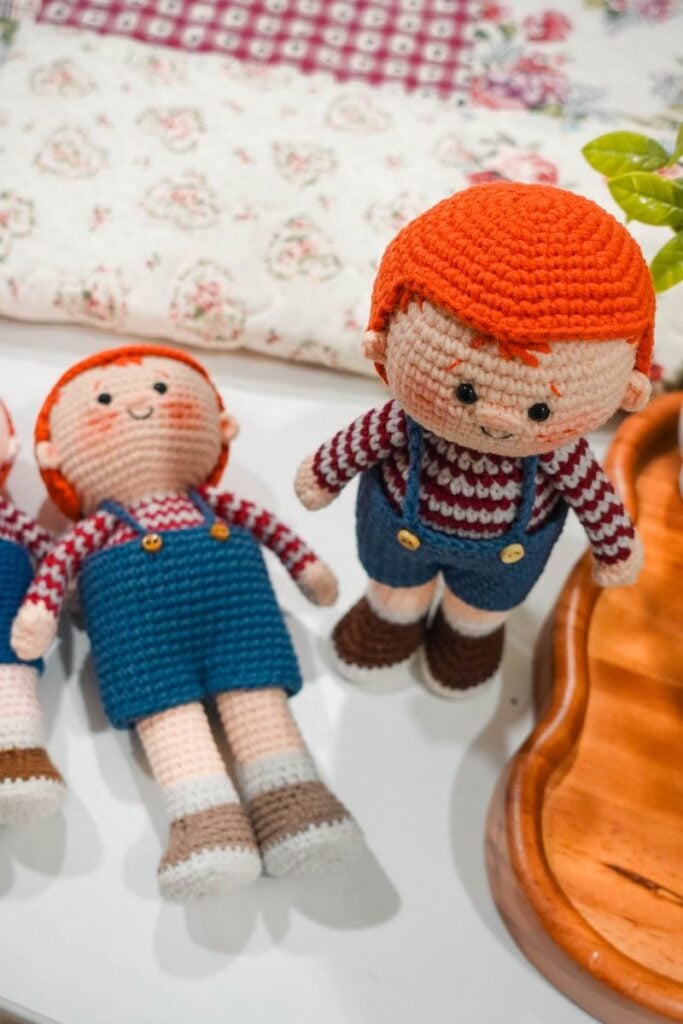
Ears (Make 2)
EARS (make 2) – with skin color
- Make 4 sc in a magic ring.
- Close the magic ring but do NOT join together.
- Fasten off and leave a long tail for sewing onto either side of the head at Rounds 49–52.
Hair Cap
HAIR CAP – with hair color
NOTE: Ch 1 does not count as a stitch
- Make 6 sc in magic ring
- Round 1: inc in each st [12]
- Round 2: (1 sc, inc) 6 times [18]
- Round 3: (2 sc, inc) 6 times [24]
- Round 4: (3 sc, inc) 6 times [30]
- Round 5: (4 sc, inc) 6 times (36)
- Round 6: (5 sc, inc) 6 times (42)
- Round 7: (6 sc, inc) 6 times (48)
- Round 8: (7 sc, inc) 6 times (54)
- Round 9: sc in each st, ch 1, turn (54)
- We will now be working back and forth in rows
- Rows 10 – 12: 36 sc, ch 1 , turn (36) 3 Rows
- Row 13: (4 sc, dec) 5 times, 6 sc, ch 1, turn (31)
- Row 14: sc in each st, ch 1, turn (31)
- Row 15: (5 sc, dec) 4 times, 3 sc, ch 1, turn (27)
- Rows 16 – 18: sc in each st, ch 1, turn (27)
- Row 19: (4 sc, dec) 4 times, 3 sc (23)
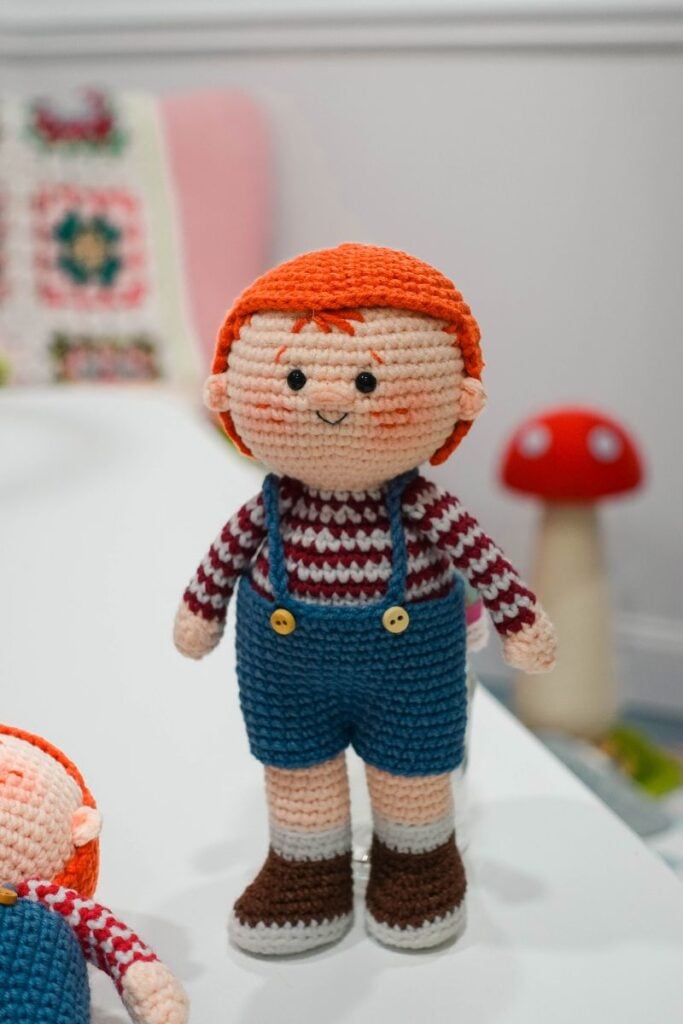
Hair Placement
- Fasten off and choose to either leave a long tail for sewing OR weave in ends and use fabric glue to secure hair (my preferred method). Center middle of magic ring from hair cap onto center middle of head. Before gluing or sewing down hair, pin hair in place. Use pins to keep hair in place while it dries. Can take up to 24 hours to fully dry.
Overalls
NOTE: Ch 1 does not count as a stitch
- Ch 40 and join in the round
- Rounds 1 – 12: sc in each st (40) 12 Rounds
- Separate the legs – Leg 1
- Round 13: 20 sc, join to first st of the round (you are skipping the last 20 stitches of the round) (20)
- Round 14: sc in each st (20)
- Fasten off and weave in ends
- Work Leg 2 by joining yarn to back of Leg 2
- Round 13: sc in each st of round (you will work across all 20 sts left of the overalls) (20)
- Round 14: sc in each st (20)
- Fasten off and weave in ends.
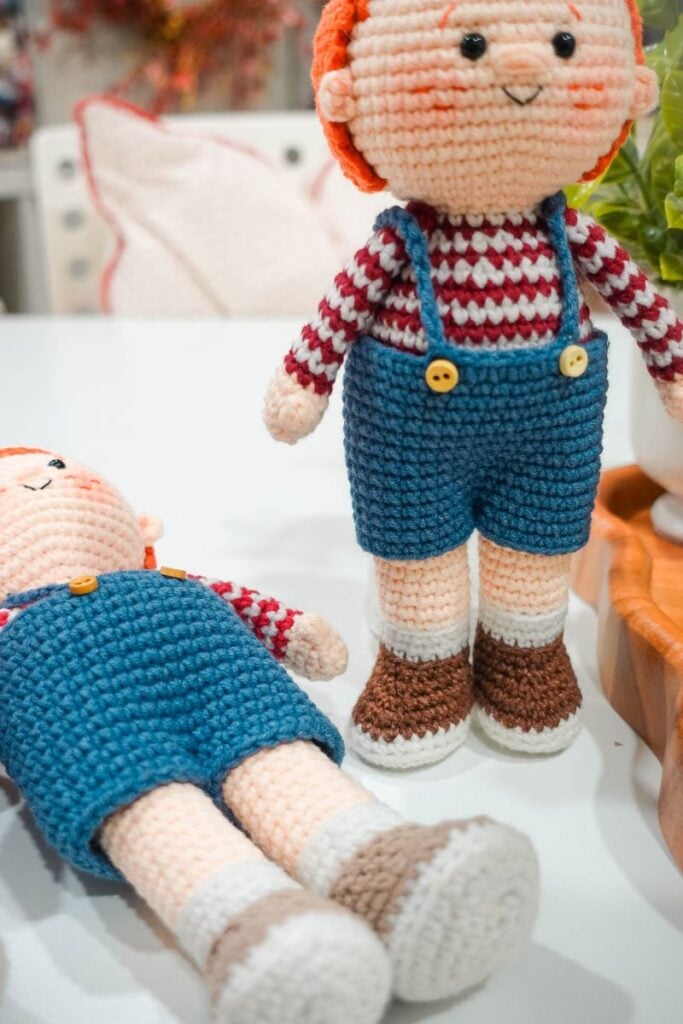
Overall Straps
- Put overalls on Sam. Mark 4 sts in original chain of overalls.
- Mark 2 in front, directly beneath shoulders and 2 in back directly beneath the shoulders. This is where you will place the straps.
- Join with a slst at middle back of original ch of overalls
- Slst to first marker, slst in st, ch 10 – 20 and join to front marker with slst
- Experiment with how many chains you need to make the straps fit.
- Slst to the next front marker, ch 10 – 20 sts and join to back marker with slst
- Slst to finish the round
- Fasten off and weave in ends.
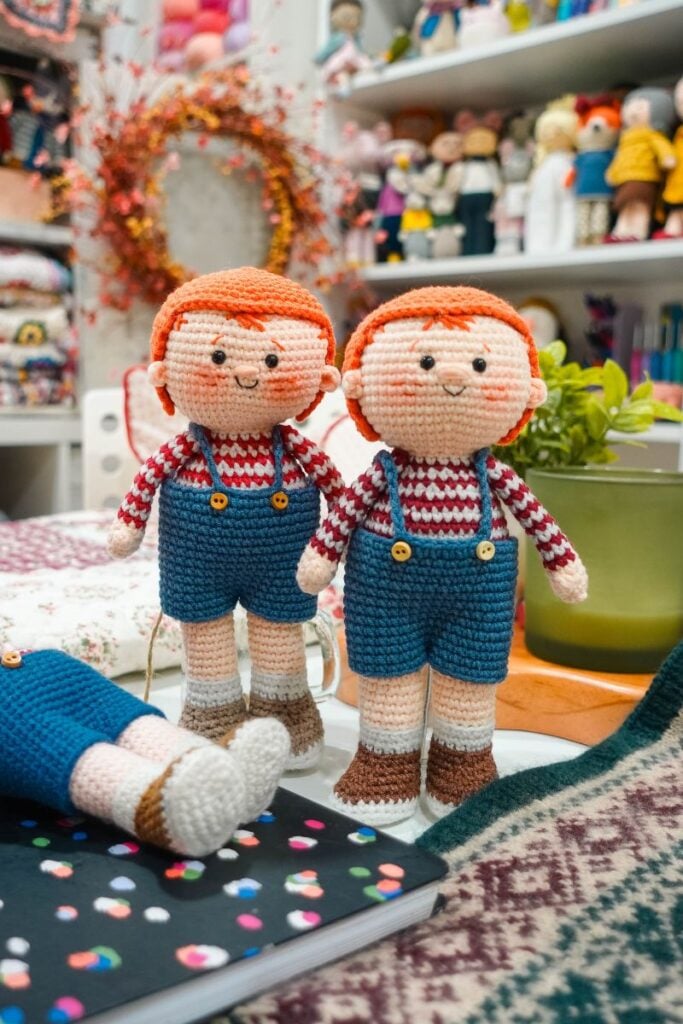
Finishing Details
ADDITIONAL DETAILS:
- Embroider eyebrows with one strand of hair color yarn (if not previously done).
- Embroider smile with one strand of black embroidery floss (if not previously done).
- Add 3 small back stitches across face, underneath eye for freckles, do this on each side for a total of 6 freckles (if not previously done).
- Add blush to cheeks.
- Wet or steam block clothing if needed.
Amigurumi Boy Doll FREE Crochet Pattern & Video Tutorial
I hope you enjoyed crocheting your very own Sam Humphrey! There’s something so special about watching a little personality come to life, one stitch at a time.
Thank you so much for choosing one of my patterns. I hope Sam brings you as much joy as he brought me while designing him. And don’t forget to check out the rest of the Humphrey family so Sam can have a little company!
Copyright and Permissions
©2026 Elise Rose Crochet, Elise Speed. All rights reserved. This pattern is for personal use only. This pattern, or any part of it, may not be reproduced, distributed, resold, translated, published, or posted in any way, either online or in print.
You have permission to sell handmade and hand-finished Sam Humphrey toys on a limited basis. Please add “Designed by Elise Rose Crochet” to the listing information as well as any tag attached to the toy.
Pin for Later

![How to Crochet a Mini Birthday Hat [+ Video Tutorial]](https://eliserosecrochet.com/wp-content/uploads/2021/07/How-to-Crochet-a-Party-Hat.png)